Adding a Layout Theme Addition
Complete the following steps to add a layout theme addition:
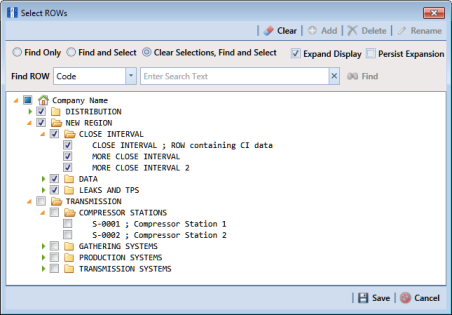
1 Select one or more pipeline segments in the
Select ROWs window (
Figure 8-52). Click
 Save
Save to close the window.
Figure 8-52. Select ROWs
2 Click
Data Entry >
Define Routes to open the
Define Routes window. Click the down arrow in the
Routes field and select a route in the selection list (
Figure 8-50).
3 Click the
Customize tab

to view the
Layouts page (
Figure 8-51).
4 Click
 Add
Add to open the
New Layout Theme dialog box (
Figure 8-53).
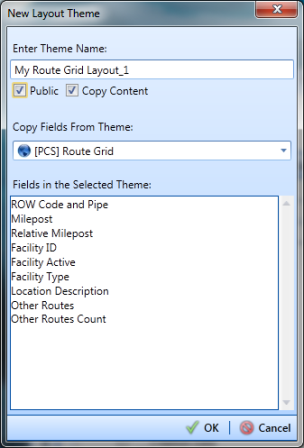
Figure 8-53. New Layout Theme
5 Type a name for the theme in the field Enter Theme Name.
6 Select the Public check box if you want the new theme available to all PCS Axis users. When a theme is not public, it is a private theme available only to the user who creates it.
Note: Creating public themes is a function available only to users assigned the SysAdmin user role. Private themes can be created by users assigned the User, Read Only, or SysAdmin user role. See
System Security for more information.
7 Select a layout theme with fields you want to copy to the new layout theme. Click the Copy Content check box and then click the down arrow in Copy Fields From Theme and select a theme in the selection list.
8 Click
 OK
OK to save changes and return to the
Layouts page.
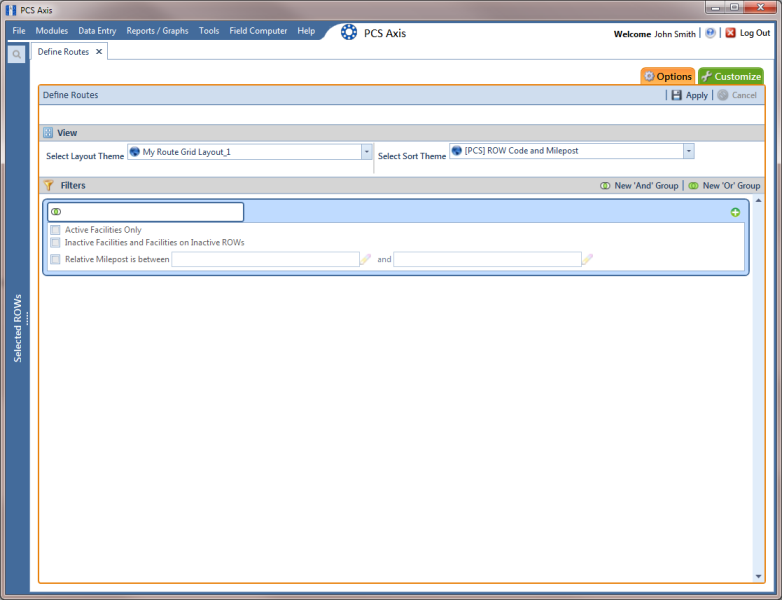
9 Verify the name of the new layout theme displays in the field Select Layout Theme. If not, click the down arrow in Select Layout Theme and select the new theme in the selection list.
11 To apply the new layout theme in the Define Routes grid, follow these steps:
a Click the
Options tab

to open the options page (
Figure 8-54).
Figure 8-54. Options
b Click the down arrow in Select Layout Theme and select the new layout theme in the selection list.
c Click
 Apply
Apply to apply changes and return to the grid in
Define Routes.
Note: Clicking
 Cancel
 allows you to close the
Options page without saving changes.