Editing an Installed Layout Theme
An installed layout theme includes [PCS] in the name of the theme, such as

[
PCS] Route Grid. A layout theme determines which fields are present when viewing or printing a route. The procedure in this section explains how to complete the following tasks to edit a PCS Axis installed layout theme:
• add fields in an installed layout theme
• remove fields in an installed layout theme
• revert an installed layout theme
To edit a PCS Axis installed layout theme, follow these steps:
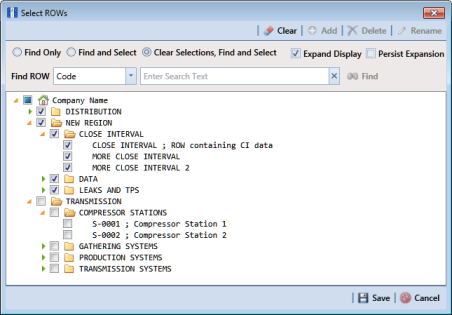
1 Select one or more pipeline segments in the
Select ROWs window (
Figure 8-49). Click
 Save
Save to close the window.
Figure 8-49. Select ROWs
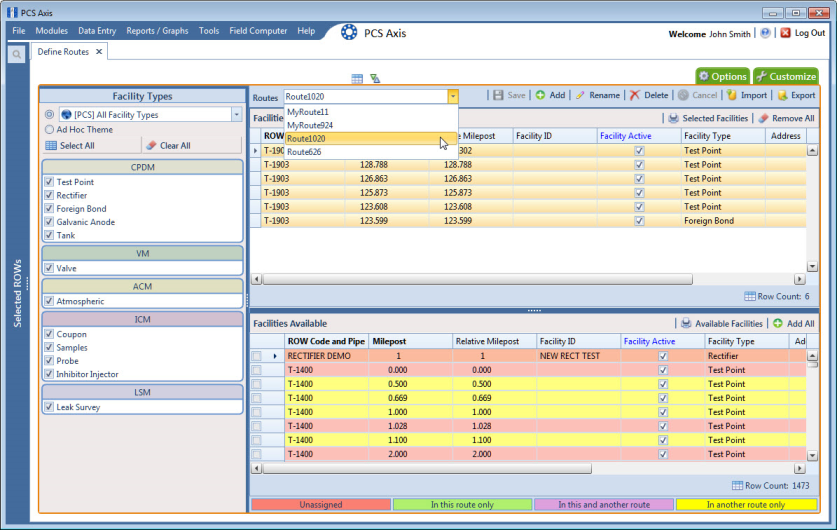
2 Click
Data Entry >
Define Routes to open the
Define Routes window. Click the down arrow in the
Routes field and select a route in the list (
Figure 8-50).
Figure 8-50. Define Routes
3 Click the
Customize tab

to view the
Layouts page (
Figure 8-51).
Figure 8-51. Layouts
4 Select a PCS Axis installed layout theme. Click the down arrow in
Select Layout Theme and select a theme in the selection list, such as
 [PCS] Route Grid
.
5 Click the toggle arrow

for a field category in the left pane to view a list of fields available for selection, such as
 All Fields
.
6 Click the check box for each field you want to include in the theme. Then click the top arrow button

to move selected fields to the right pane. The theme includes all fields listed in the right pane.
Note: Double-clicking a field in the left pane also moves it to the right pane.
7 To remove fields in an installed layout theme:
• Select one or more fields listed in the right pane, then click the bottom arrow button

.
Note: Double-clicking a field in the right pane also moves it back to the left pane. Fields with a lock icon

are required and cannot be removed from the theme, such as
 Milepost
.
8 Click
 Save
Save to save changes.
9 To revert an installed theme and restore settings prior to editing, click
 Revert
, then click
Yes when the
Confirm Revert message displays.
10 Click
 Save and Close
 to save changes and return to the
Define Routes window.