Adding a New User
To add a new user in PCS Axis, follow these steps:
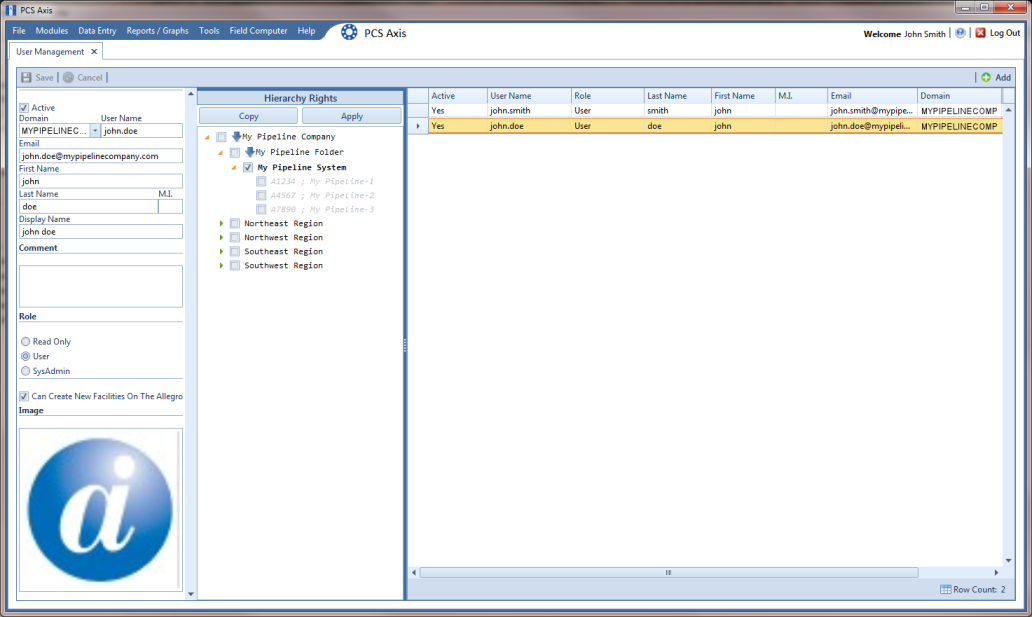
1 Click
Tools >
User Management >
 Add
Add (
Figure 5-1).
Figure 5-1. Adding a New User
2 Type a user name in the User Name field and the user’s email address in the Email field.
3 Complete the following steps as needed:
a Edit information in the fields First Name, Last Name and Display Name.
b Type information in the Comment field.
4 Select a PCS Axis user role by clicking the
Read Only,
User, or
SysAdmin button. If needed, see
System Security for information about user role security permissions.
5 If you want to allow the user to create new facilities on the Allegro Field PC, click the check box Can Create New Facilities On the Allegro.
Note: Clicking the Hierarchy Rights bar collapses the Hierarchy Rights panel allowing you to view more of the grid. Clicking the bar again expands the panel.
6 If you want to include an image in the user account, complete the following steps. Maximum image size is 150 x 150 (measured in pixels). Valid image formats are BMP, JPG, GIF, and PNG.
a Hover the mouse over the
Image field to display a toolbar

.
b Click the open icon

in the image toolbar to open Windows Explorer. Locate and select an image, then click
Open to close the window.
7 If PCS Axis is set up with Hierarchical Security in Options, set permissions in Hierarchy Rights to identify which parts of the hierarchy the user will have access. This step applies only to users assigned with the User or Read Only user role. SysAdmin has full access to all items in the hierarchy.
To grant access, click the check box for an item in the hierarchy to place a check mark inside the check box. To remove access, click the check box again to remove the check mark. When you finish, click
Apply. For information about
Hierarchical Security in
Options, see
Setting Security Options.
Note: Items in the hierarchy with a check mark indicate the user has access. If a check mark is not present, the user does not have access.
8 Click
 Save
Save to save changes.
Related Topics