Editing a Custom Security Role
To edit permissions in a custom security role, follow these steps:
1 If the Security Role Management window is not open, click Tools > Security Role Management.
2 Click the down arrow in the
Role field and select a custom security role in the selection list. Then click
 Edit
Edit to begin editing permissions (
Figure 3-19).
Note: If the custom security role is not visible in the selection list, click the down arrow in the Parent Role field and select either User or SysAdmin, then select the custom security role in the Role field.
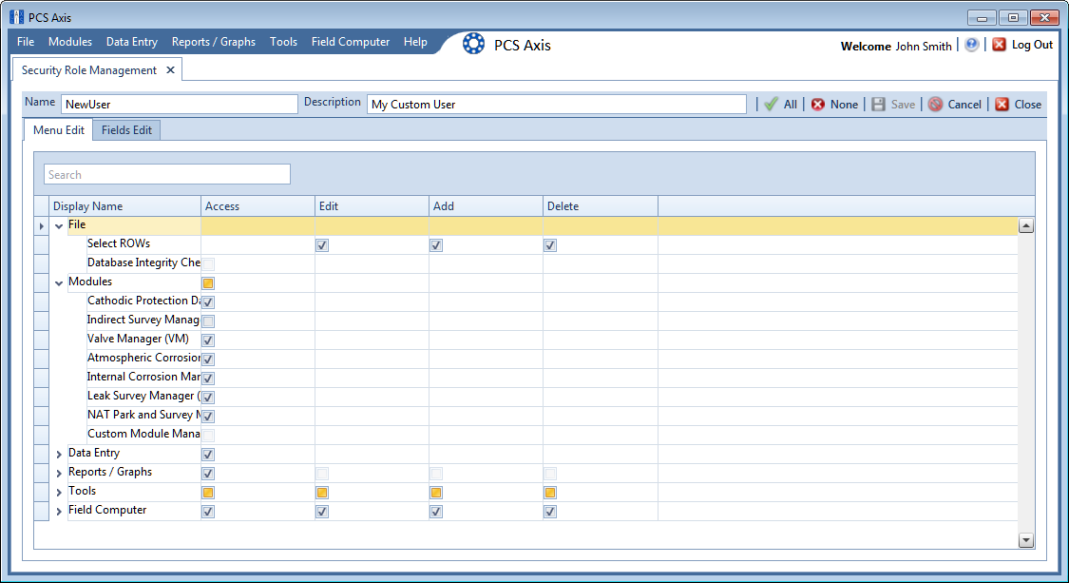
Figure 3-19. Edit Security Role - Menu Edit Tab
3 Click the
Menu Edit tab (
step 4) or the
Fields Edit tab (
step 7) to edit permissions.
4 Use the following methods to edit menu permissions for the custom security role:
Note: You can toggle permissions on and off for all items in the window. Click
 All
All to grant access to all items or
 None
None to deny access to all items.
Note: Use the Search box located above the Display Name column to quickly find a command name.
a To grant access to an entire menu listed in the
Display Name column, click the adjacent check box to place a check mark inside the check box

.
b To deny access to an entire menu listed in the
Display Name column, click the adjacent check box to remove the check mark inside the check box

.
c To grant or deny access to sub-menu commands, click the arrow next to the main menu name to expand the list
(Figure 3-20).
Figure 3-20. Expanded Menu Commands
Note: The columns can be expanded by hovering over the dividing line until the cursor changes to

and then clicking and dragging the cursor.
d To grant access to a sub-menu listed in the
Display Name column, click the adjacent check box to place a check mark inside the check box

.
e To deny access to a sub-menu listed in the
Display Name column, click the adjacent check box to remove the check mark inside the check box

.
f Repeat
step 4 as needed for each menu and sub-menu command listed in the
Display Name column.
5 Click
 Save
Save to save changes.
6 Click the
Fields Edit tab to edit permissions for fields
(Figure 3-21).
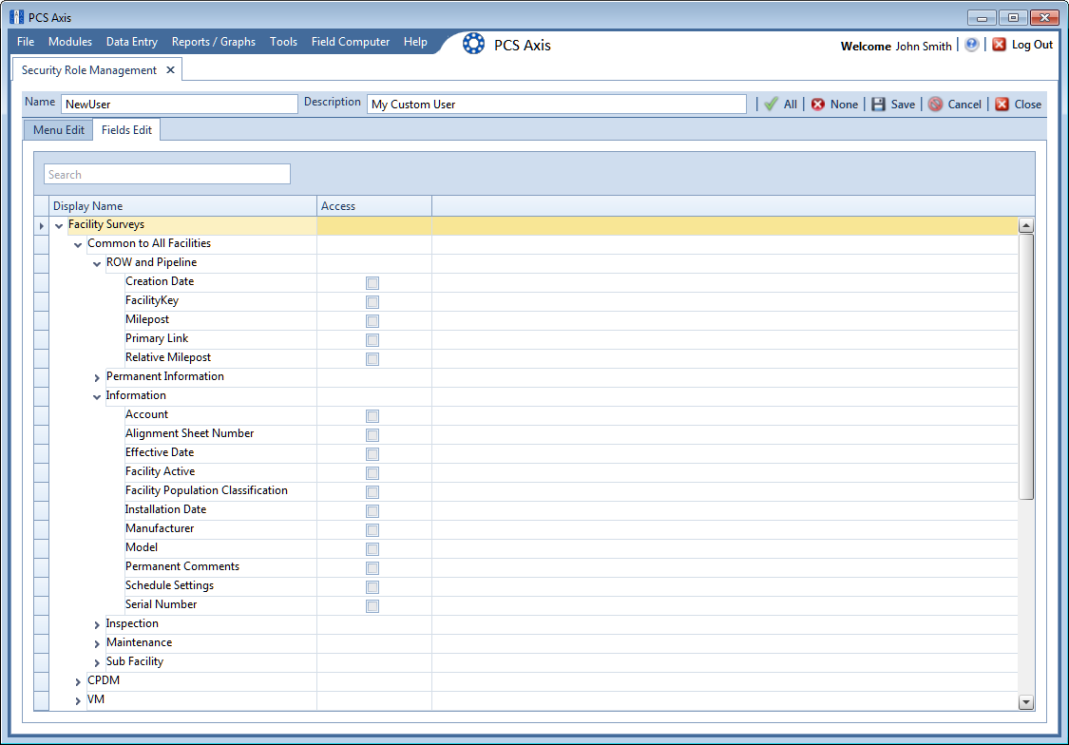
Figure 3-21. Edit Security Role - Fields Edit Tab
7 Use the following methods to edit field permissions for the custom security role:
Note: You can toggle permissions on and off for all items in the window. Click
 All
All to grant access to all items or
 None
None to deny access to all items.
Note: Use the Search box located above the Display Name column to quickly find a field name.
a To grant access to an entire category listed in the
Display Name column, click the adjacent check box to place a check mark inside the check box

.
b To deny access to an entire category listed in the
Display Name column, click the adjacent check box to remove the check mark inside the check box

.
c To grant or deny access to sub-category fields, click the arrow next to the main category name to expand the list
(Figure 3-22).
Figure 3-22. Expanded Fields
Note: The columns can be expanded by hovering over the dividing line until the cursor changes to

and then clicking and dragging the cursor.
d To grant access to a sub-category field listed in the
Display Name column, click the adjacent check box to place a check mark inside the check box

.
e To deny access to a sub-category field listed in the
Display Name column, click the adjacent check box to remove the check mark inside the check box

.
f Repeat
step 7 as needed for each category and sub-category field listed in the
Display Name column.
8 Click
 Save
Save to save changes.
Related Topics