Setting Email Notification Options
The Email Notification options determine how email reports should be sent. A Public caption in this Options screen indicates the associated property setting applies globally to all users and can only be changed by a SysAdmin.
Complete the following steps to set Email Notification property settings:
1 If the
Options window is not open, click
Tools >
Options to open the window. Then click the
Email Notification tab (
Figure 3-9).
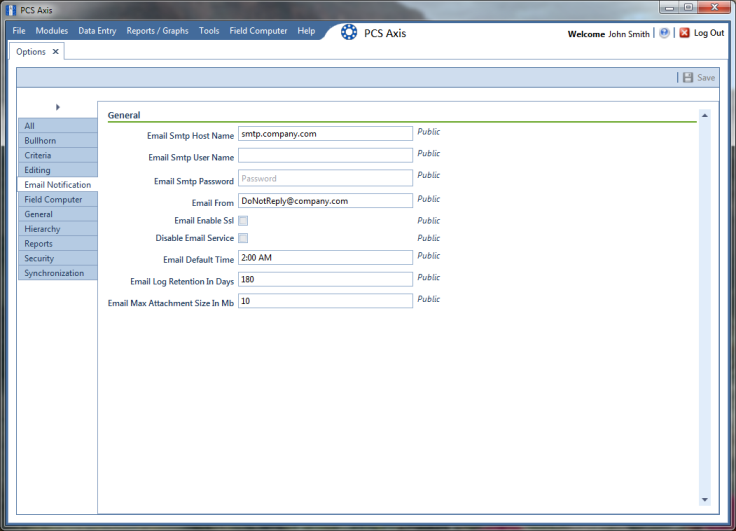
Figure 3-9. Email Notification Options
2 Type the host name of the SMTP email server your company uses to send email in the field Email Smtp Host Name.
Note: SMTP is an acronym for Simple Mail Transfer Protocol. It is a data transmission format used to send email.
3 Type a user name in the field Email Smtp User Name that is associated with the email address you plan to use for sending email notifications.
4 Type a password in the field Email Smtp Password that is associated with the user name and email address you plan to use for sending email notifications.
5 In the field Email From, type the email address you plan to use for sending email notifications.
6 If the email server supports SSL protocol, click the check box Email Enable Ssl to place a check mark inside the check box.
When an email server supports SSL (secure socket layer) protocol, the email server transmits information in an encrypted form for security purposes. If needed, contact your IT System Administrator to determine if your company’s email server supports SSL.
Note: When
Email Enable Ssl is disabled (empty check box) and the email server supports SSL protocol, recipients will not receive PCS Axis email notifications. PCS Axis also adds an entry in the log of
Job Service Viewer to identify email notification failures (
Tool >
Job Service Viewer >
Job History >
Log).
7 Use the check box Disable Email Service to stop or start sending email notifications to all email recipients.
To stop sending email notifications to
all recipients, click the check box to place a check mark inside the check box. To begin sending email notifications again, clear the check mark by clicking the check box. For more information, refer to
Stopping Delivery of Email Notifications.
8 Enter a default time to send email notifications in the field Email Default Time. Use 12-hour time format to indicate the hour, minute, and AM/PM setting (HH:MM AM/PM). The default time is used when an email report is not set up with a delivery time in the Email Reports tab of Email Notification (Tools > Email Notification > Email Reports tab).
Important: When setting a default time to send email notifications, choose a time that does not impact other network services or computer resources.
9 In the field Email Log Retention In Days, enter the number of days to store a copy of the email log in the database. Entries in the email log are purged from the log after the specified number of days.
Important: Storing the email log in the database increases the size of the database. PCS Axis adds an entry in the log each time an email is sent. The log also includes email recipient information; email delivery mode and frequency; hierarchy assignments; and email report attachments in Adobe® PDF format.
10 In the field Email Max Attachment Size In Mb, enter a value in megabytes (MB) that identifies the maximum size allowed by the email server for attachments in an email. Because some email servers are set up to process emails no larger than 10 MB in size, it may be necessary to contact your IT department for this information to ensure email recipients receive email notifications.
11 Click
 Save
Save to save changes.
Related Topics