Adding an AND Filter Group
An AND filter group is a named set of one or more filters that affect the data output in the Survey Folder Maintenance grid. Adding an AND filter group produces a subset of records that meet all filter conditions. PCS Axis processes filters in a filter group in descending order beginning with the filter at the top of the filter group.
To add an AND filter group, follow these steps:
1 Select one or more pipeline segments in the
Select ROWs window. Click
 Save
Save to close the window (
Figure 6-3).
2 Click Modules > Indirect Survey Manager (ISM) to open the ISM module.
3 Click Data Entry > Survey Folder Maintenance to open the Survey Folder Maintenance window.
Note: Clicking the Selected ROWs bar collapses the Selected ROWs panel allowing you to view more of the grid. Clicking the Selected ROWs bar again expands the Selected ROWs panel.
4 Click a button labeled with the type of continuous survey that you want to add an AND filter group. For example, click the
CIS button

to add a filter group for a continuous survey associated with close interval survey readings (
Figure 6-8).
5 Select a survey in the
Survey Folder Maintenance grid, then click the
Customize tab

.
6 Click the
Filters button

to open the
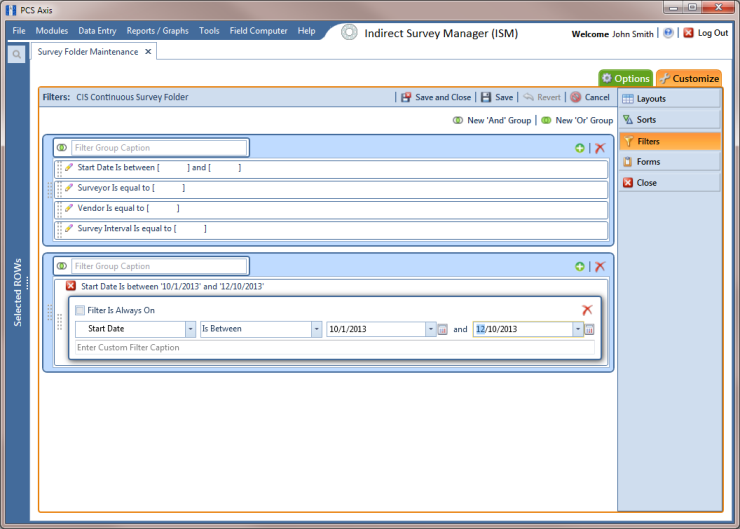
Filters page. Then click
 New ‘And’ Group
 to open a filter properties group box (
Figure 6-18).
7 Type a name for the filter group in the field Filter Group Caption.
8 Use filter selection fields to set up filter criteria. Select a PCS Axis field, operator, and one or more filter conditions.
9 If the AND filter group includes a date filter, such as
Start Date Is Between shown in
Figure 6-18, set a date range using a calendar or dynamic dates in the following manner:
• To set a date range using a calendar, click the down arrow in the start date field to open a calendar and select a date. Repeat this step for the end date field.
• To set a date range using dynamic start and end dates, click the

calculator button in the start date field and set up dynamic date properties. Repeat this step for the end date field. Clicking the calculator button opens and closes dynamic date property fields.
10 If you want the filter to remain on for all sessions of the data entry grid, select the check box Filter is Always On. When this check box is not selected, toggle the filter on and off in the Options page using the filter’s check box.
11 Type a name for the filter in the field Enter Custom Filter Caption.
Figure 6-18. Filters
12 If you want to set up additional filter criteria for the filter group:
a Click
 Add
Add to open another filter properties group box.
13 To move a filter to a different position in the filter group or a filter group to a different position in a group of filters:
a Point the mouse at the filter handle

to change the cursor to a vertical resize cursor

.
b Drag and drop the filter or the filter group to a new location.
Note: PCS Axis processes filters in descending order beginning with the filter at the top of the filter group.
14 Click
 Save
Save.
Note: Clicking the

edit icon for a particular filter opens that filter’s property settings allowing you to change settings as needed.
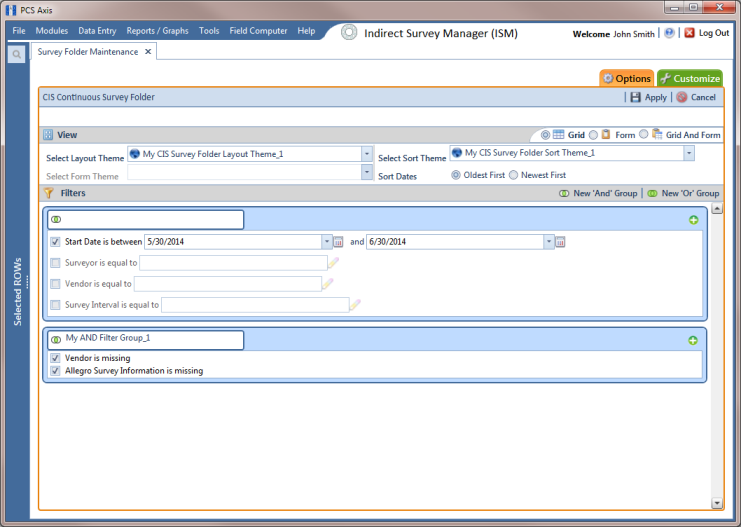
15 To apply one or more custom filter groups to the
Survey Folder Maintenance grid (
Figure 6-19):
a Click the
Options tab

to open the options page.
b Click the check box for each filter you want to apply to the grid.
16 Choose a method for sorting records in the grid. Click Oldest First or Newest First in Sort Dates to sort records with the oldest or newest inspection dates first.
17 Click
 Apply
Apply to save changes and return to the grid. If you want to cancel changes and return to the grid, click
 Cancel
.
Clicking the
Options tab

also allows you to save changes and return to the grid.
Figure 6-19. Options