Adding a Continuous Survey Folder
A continuous survey folder must first be added in Survey Folder Maintenance before working with survey readings in an ISM data grid, report, or graph. Adding a continuous survey folder includes the following tasks:
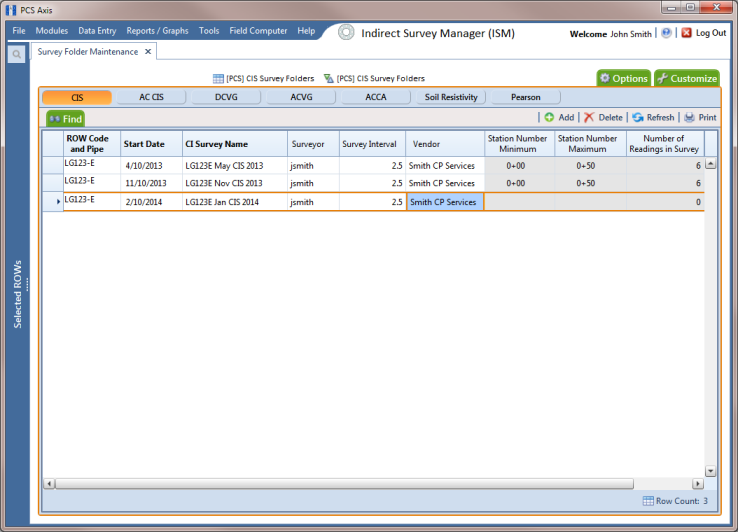
• Choosing the type of continuous survey, such as CIS, AC CIS, DCVG, ACVG, ACCA, Soil Resistivity, or Pearson.
For a description of the different types of continuous surveys supported in PCS Axis, see
Appendix B.
• Providing the survey start date and survey name. These property settings allow you to identify the correct survey folder when adding survey readings or working with reports and graphs in ISM.
• As an option, providing the name of the surveyor and/or the vendor performing the survey.
To add a continuous survey folder, follow these steps:
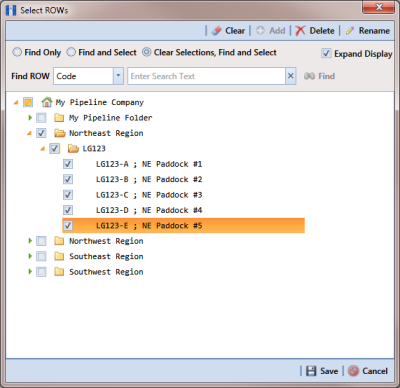
1 Click the
Select ROWs button

to open the
Select ROWs window (
Figure 6-3). Select the pipeline segment(s) with the facilities you want to work with, then click
 Save
Save to close the window.
Figure 6-3. Select ROWs
2 Click Modules > Indirect Survey Manager (ISM) to open the ISM module.
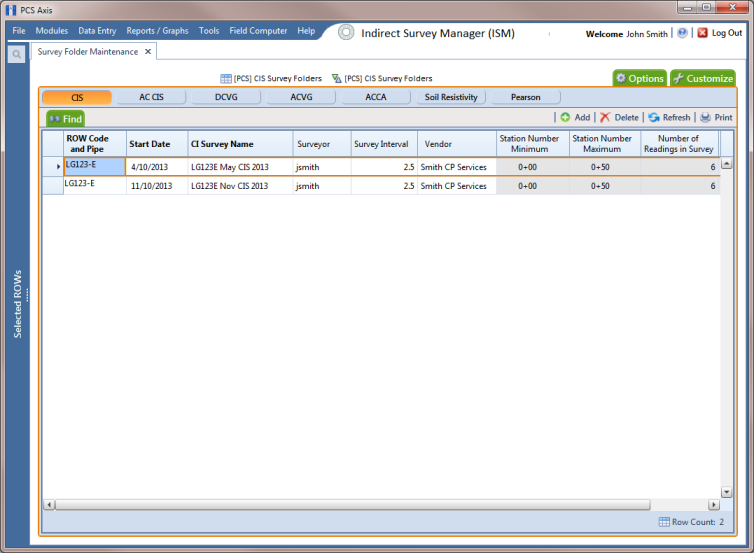
3 Click
Data Entry >
Survey Folder Maintenance to open the
Survey Folder Maintenance window (
Figure 6-4).
Note: Clicking the Selected ROWs bar collapses the Selected ROWs panel allowing you to view more of the grid. Clicking the Selected ROWs bar again expands the Selected ROWs panel.
Figure 6-4. Survey Folder Maintenance
4 Click a button labeled with the type of continuous survey that you want to add a survey folder. For example, clicking the
CIS button

adds a survey folder for close interval survey readings (
Figure 6-4).
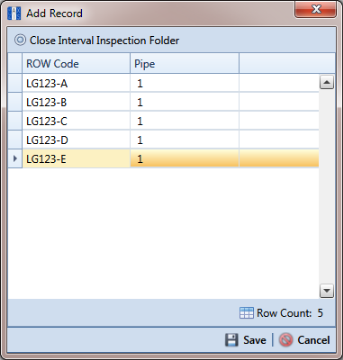
5 Click the
 Add
Add button to open the
Add Record dialog box (
Figure 6-5).
6 Select the pipeline segment that you want to add a continuous survey folder. In the following example, pipeline segment LG123-E is selected.
Figure 6-5. Add Record
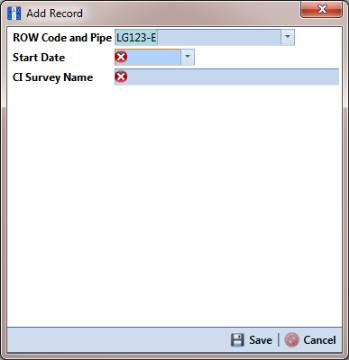
7 Click
 Save
Save to display required fields for data entry. Required fields are identified with the

icon, such as
Start Date and
CI Survey Name in the next figure (
Figure 6-6).
8 Type a survey start date in the Start Date field using the format MM/DD/YYYY to indicate the month, day, and year. Or click the down arrow in the field and select a date using a calendar.
9 Type a name for the survey folder in the field CI Survey Name. The field accepts up to 50 alphanumeric characters.
Figure 6-6. Add Record
10 Click
 Save
Save to close the
Add Record dialog box and add a row of records in the grid for the new continuous survey folder (
Figure 6-7).
11 Provide other information about the survey folder as needed. For example, type the surveyor’s name in the Surveyor field; the survey interval in the Survey Interval field; and the name of the company performing the survey in the Vendor field.
12 Click
 Refresh
 to update the grid.
The survey folder is now available for selection when working with survey readings in Edit ISM Data (Data Entry > Edit ISM Data), reports, and graphs.
Figure 6-7. Survey Folder Maintenance