Adding a Pipeline Information Record
Use the Information grid in Edit ROW Detail to add an information record for a pipeline selected in the Select ROWs window. Adding an information record allows you to maintain history records when important permanent information changes, such as when a pipeline is taken out of service or is sold to another business.
Note: If you are working with the optional
Telluric Compensation feature, the required field labeled
Telluric Compensation Required must be added in the
Information grid and enabled for each pipeline segment requiring telluric compensation. For more information refer to
Adding a Layout Theme.
To add a pipeline information record, follow these steps:
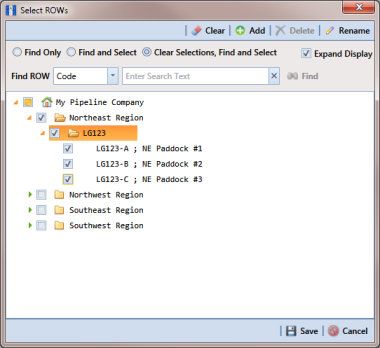
1 Click the
Select ROWs button

to open the
Select ROWs window (
Figure 4-12).
Figure 4-12. Select ROWs
2 Select one or more pipeline segments you want to work with by clicking the check box for each pipeline segment. Click
 Save
Save to close the window.
Note: A check mark inside a check box indicates a selection. To clear a selection, click the check box again to remove the check mark. A shaded check box indicates selection of some, not all, child folders, ROWs, and pipelines.
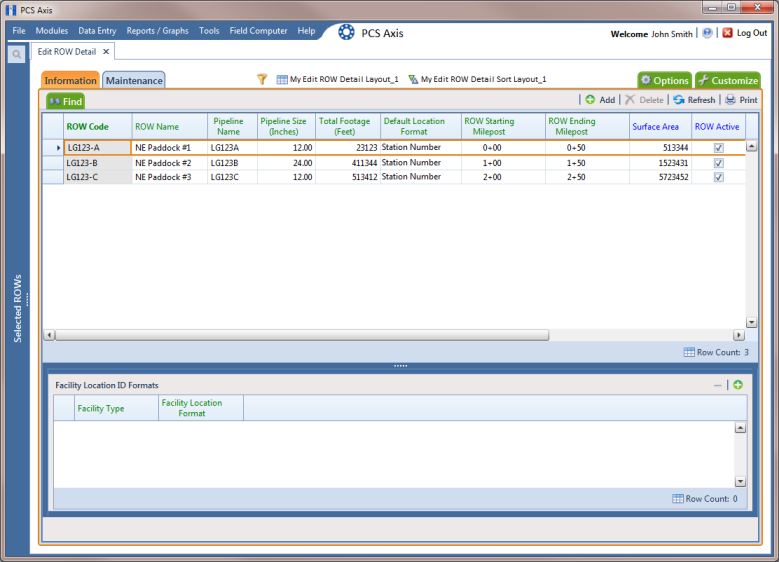
3 Open the
Edit ROW Detail grid. Click
Data Entry >
Edit ROW Detail (
Figure 4-13).
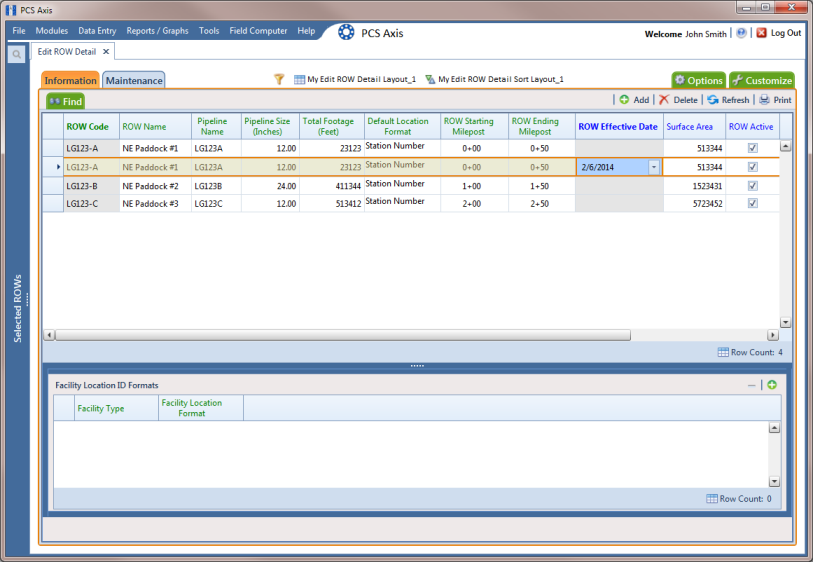
Figure 4-13. ROW Detail Information Grid
4 If you want to collapse the Selected ROWs panel to view more of the grid, click the Selected ROWs bar. Clicking the bar again expands the panel.
5 If the
Information grid is not visible, click the
Information tab

.
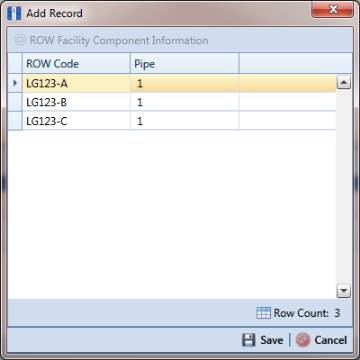
6 Click
 Add
Add to open the
Add Record dialog box (
Figure 4-14).
Hint: Alternatively, you can use a keyboard shortcut key to add records. Press F4 to add an information record for an existing pipeline in the grid.
Figure 4-14. Add Record
7 Select the pipeline in the dialog box that you want to add an information record. For example, pipeline
IS-0767-01 is selected in
Figure 4-14.
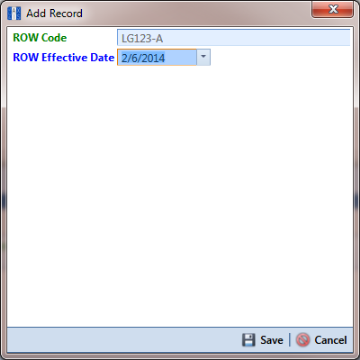
8 Click
 Save
Save to display required field(s) for data entry (
Figure 4-15).
Figure 4-15. Add Record
9 Type a date in the Effective Date field using the format MM/DD/YYYY to indicate the month, day, and year. Or click the down arrow in the field and select a date using a calendar.
10 Click
 Save
Save to close the
Add Record dialog box and add the new information record in the grid for the existing pipeline (
Figure 4-15).
Figure 4-16. ROW Detail Information Grid - New Record
11 Provide other pipeline data in the grid as needed, such as Permanent Comments.
12 Click
 Refresh
 to update the grid.