Adding a Normal User Defined Field
To add a Normal user defined field (UDF), follow these steps:
1 Click
Tools >
Field and UDF Customizations to open the
Field and UDF Customizations window (
Figure 3-29).
2 If you want to select a grid layout theme, follow these steps:
a Click
 Customize
 to open the
Column Selections dialog box (
Figure 3-32).
b Click the down arrow in Select a Layout Theme and select a theme in the selection list.
c Click
 Save
Save to close the dialog box and return to the
Field and UDF Customizations window.
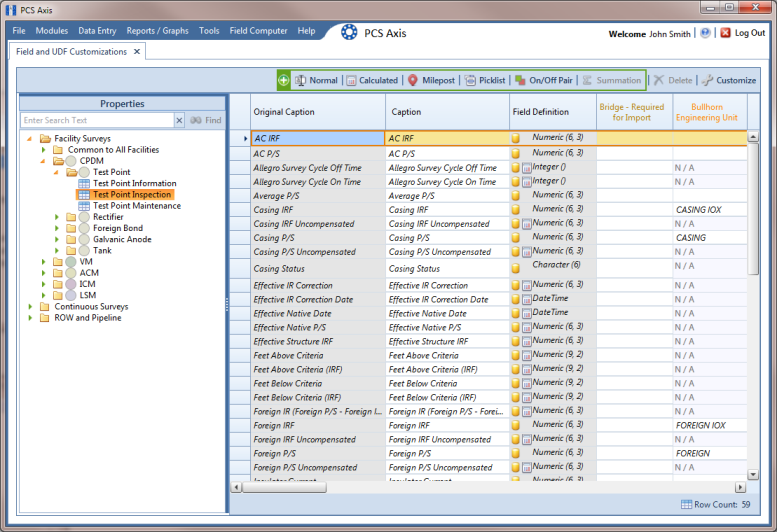
3 Select an item in the
Properties panel that includes the data entry grid you want to add a UDF. For example, double-click
Facility Surveys >
CPDM >
Test Point > Test Point Inspection to display a grid with fields and property settings related to the
Test Point Inspection data entry grid (
Figure 3-36).
Note: Clicking the Properties bar collapses the Properties panel allowing you to view more of the grid. Clicking the bar again expands the panel.
Figure 3-36. Field and UDF Customizations
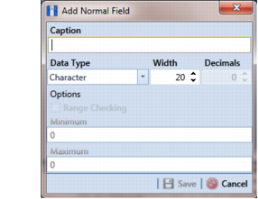
4 Click
 Normal
 in the toolbar to open the
Add Normal Field dialog box (
Figure 3-37).
5 Type a unique name for the UDF in the Caption field.
Figure 3-37. Add Normal Field
6 Choose the type of field you want to add. Click the down arrow in the Data Type field and select one of the following options:
• Character: Supports characters such as A, B, and C. This data type can be used for both character and numeric data. If you plan to use mixed data, such as a number and a character or dash, define the data type as a character. If you plan to create a picklist for the UDF, use the
Character data type. For more information about picklists, see
Adding a Standard Picklist User Defined Field.
• Numeric: Supports values such as 1, 2, and 3 and numeric values using the following format: 999.999 and –99.999.
• Date: Supports a date format using MM/DD/YYYY (month, day, year), such as 11/12/2012.
• Logical: Supports a yes/no selection in the form of a check box to enable or disable an option in the data entry grid.
• Memo: Supports more than 255 characters and carriage returns.
• DateTime: Supports a date and time format using HH:MM:SS (hours, minutes, seconds) and MM/DD/YYYY (month, day, year). Such as 11:15:45, 12/11/2012.
• Integer: Supports a positive or negative whole number, or zero. Such as -2, 4, 123, and 3,245.
7 If you selected the Character or Numeric data type earlier, set the length of the field by typing the number of characters required for the UDF in the Width field.
Clicking the up arrow in the Width field increases the value; clicking the down arrow decreases the value.
8 If you selected the Numeric data type earlier, set the number of decimal places required for the UDF by typing a value in the Decimals field.
9 If you selected the Numeric data type earlier and want to set up range checking for the UDF, click the Range Checking option and then type a minimum and maximum value in the respective fields.
Note: Range checking is the acceptable range of values allowed for data entry in a field. Setting up range checking allows PCS Axis to alert the user when an incorrect value has been entered.
10 Click
 Save
Save to close the dialog box and return to the
Field and UDF Customizations window.