Restarting the PCS Axis Job Service
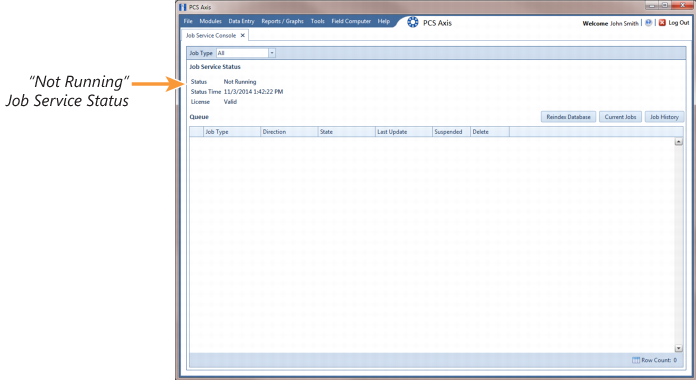
If the message
Not Running displays in the
Status field of the Job Service Console as shown in the following figure (
Figure 11-3), use the procedure in this section to restart the PCS Axis Job Service. PCS Axis Job Service monitors the job queue, initiating jobs as they become available.
Figure 11-3. Job Service Status
Complete the following steps to verify connection settings are correct and restart the PCS Axis Job Service:
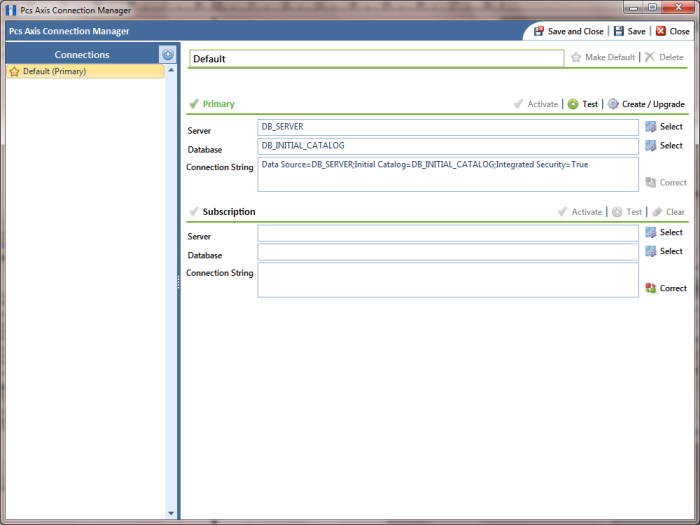
1 Start PCS Axis Connection Manager and verify connection settings specify the correct server and database as follows:
a Click the Windows
Start button

and navigate to the program folder labeled
PCS Axis 1.9. Select
PCS Axis Connection Manager 1.9 to start the program (
Figure 11-4).
b Verify the server name is correct in the
Server field and the database name is correct in the
Database field. If either is incorrect, click
 Select
 in the
Server field to select the correct server or click
 Select
 in the
Database field to select the correct database.
c Verify the Connection String field includes the correct server and database name.
d Click
 Save
Save and then click
 Test
Test to verify connection settings. When connection settings are correct, the message
Connection successful displays. Click
 OK
OK to close the message and then click
 Close
Close to exit PCS Axis Connection Manager.
Important: If connection settings are incorrect, contact your company’s Database Administrator or IT Administrator for the name of the correct server and database. The information will then need to be set in PCS Axis Connection Manager using the steps in this procedure.
Figure 11-4. PCS Axis Connection Manager
2 If the PCS Axis database and PCS Axis Job Service are installed on two different network servers, complete the following steps to set up a user account to log on as a service. The user account must be a member of the Axis_Users group and have access to the central database server and PCS Axis database.
a Click the Windows
Start button

and navigate to
Computer. Right-click
Computer and select
Manage in the shortcut menu to open the
Computer Management console (
Figure 11-5).
b Double-click Services and Applications in the left pane of the console. Then click Services to display a list of services in the middle pane.
Figure 11-5. Computer Management Console
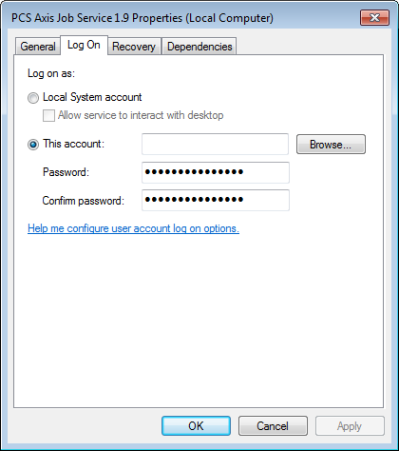
c Right-click
PCS Axis Job Service 1.9 (
Figure 11-7) and select
Properties in the shortcut menu to open the
Properties dialog box (
Figure 11-6).
Figure 11-6. PCS Axis Job Service Properties
d Click the Log On tab and select the option This account. To set up a user account to log on as a service, type the user name and password in the appropriate fields. You can also view a list of appropriate user accounts by clicking Browse > Advanced > Find Now.
e Click Apply and then OK to close the Properties dialog box and return to the Computer Management console.
3 Complete the following steps in the Computer Management console to restart the PCS Axis Job Service:
a Select
PCS Axis Job Service 1.9 and then click
Start (
Figure 11-7).
b Click File > Exit to close the Computer Management console.
c In PCS Axis, verify the message
Running displays in the
Status field of the Job Service Console (
Figure 11-3).
Important: If the PCS Axis Job Service does not start, contact PCS Technical Services using the contact information in section titled
Technical Support.
Figure 11-7. Computer Management Console
Related Topics