Adding Timed Reading Fields in the Information Grid
Timed reading fields are added in the Test Point Information data entry grid to allow data entry of inspection readings in the Test Point Inspection data entry grid for an averaged reading survey. Information in this section explains how to add timed reading fields in a layout theme and then apply the theme to the Information data entry grid.
Complete the following steps:
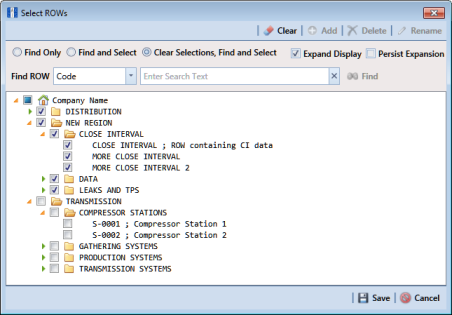
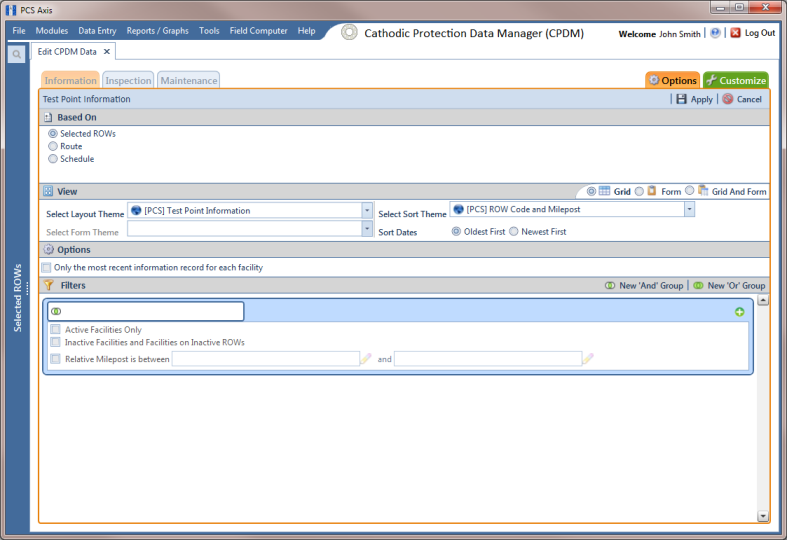
1 Select one or more pipeline segments in the
Select ROWs window (
Figure 8-13). Select pipeline segments with facilities you plan to include in the route. Click
 Save
Save to close the window.
Figure 8-13. Select ROWs
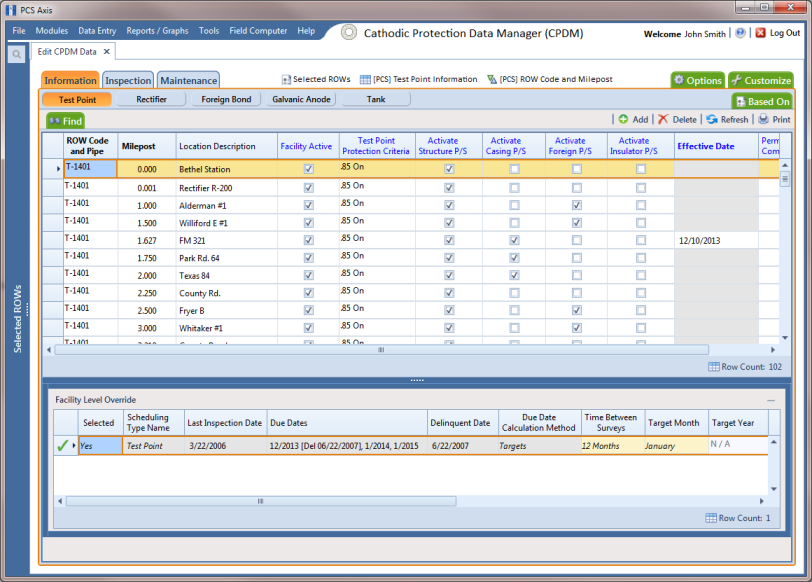
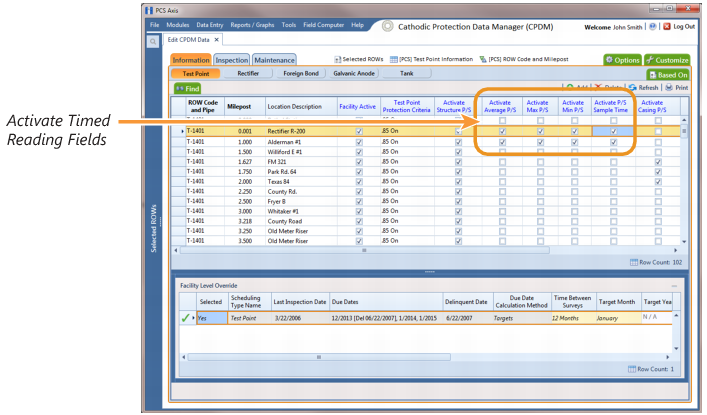
2 Click Data Entry > Edit CPDM Data.
3 Click the
Test Point button

, then the
Information tab

to open the
Test Point Information data entry grid (
Figure 8-14).
Figure 8-14. Test Point Information Data Entry Grid
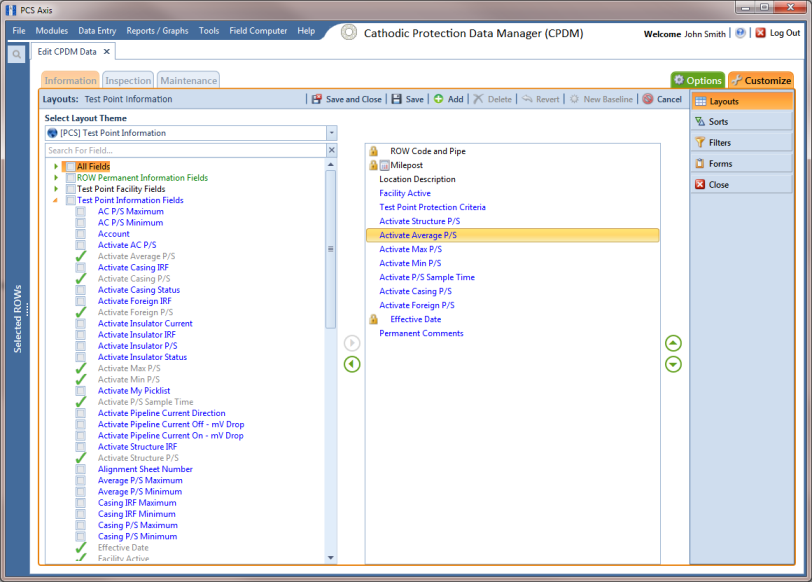
4 Click the
Customize tab

to open the
Layouts page (
Figure 8-15).
Figure 8-15. Layouts
5 Select a data entry grid layout theme. Click the down arrow in Select Layout Theme and select a theme in the selection list.
6 Double-click
 Test Point Information Fields
 in the left pane of the window to view a list of fields available for selection (
Figure 8-16).
Figure 8-16. Test Point Information Fields
7 Add the following list of timed reading fields in the layout theme. To add fields, double-click each timed reading field listed in the left pane of the Layouts page to move fields to the right pane. Add other fields as required. The data entry grid layout theme includes all fields listed in the right pane of the Layouts page.
• Activate Average P/S
• Activate Max P/S
• Activate Min P/S
• Activate P/S Sample Time
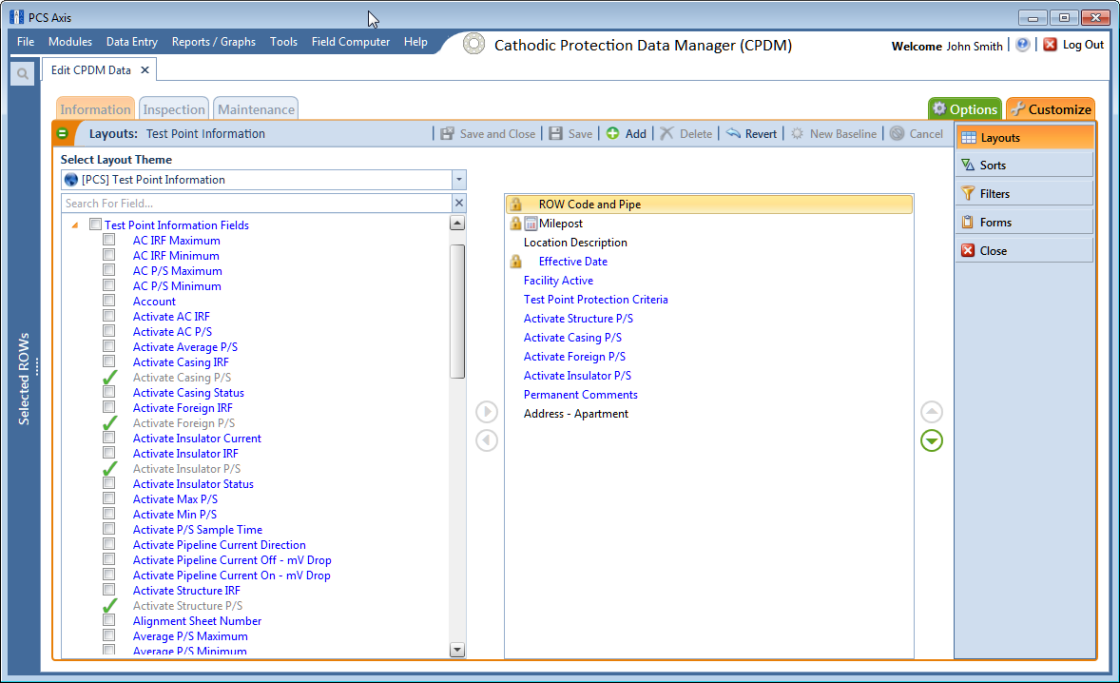
8 Click
 Save
Save, then click the
Options tab

to open the options page (
Figure 8-17).
Figure 8-17. Options
9 Apply the layout theme to the data entry grid. Click the down arrow in the field Select Layout Theme and select the layout theme with timed reading fields.
10 Click
 Apply
Apply to save and apply changes. PCS Axis closes the options page and returns to the
Test Point Information data entry grid.
11 In each column labeled with an “activate” timed reading field, click the check box associated with the facility you plan to record Allegro timed readings (
Figure 8-18).
Figure 8-18. Test Point Information Data Entry Grid