Creating a Route
The following information explains how to create a route with a list of facilities for inspection. Facilities for inspection are based on the pipeline segment(s) you select in the Select ROWs window.
Complete the following steps:
1 Click the
Select ROWs button

to open the
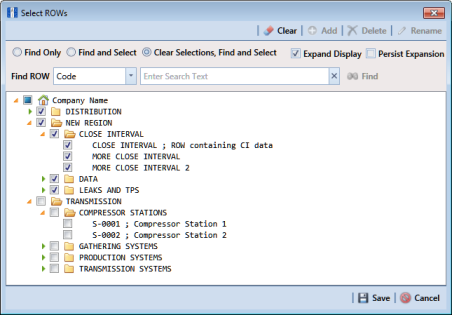
Select ROWs window (
Figure 8-6). Select one or more pipeline segments with facilities you want to include in the route. Click
 Save
Save to close the window.
Note: A check mark inside a check box indicates a selection. To clear a selection, click the check box again to remove the check mark. A shaded check box indicates selection of some, not all, child folders, ROWs, and pipelines.
Figure 8-6. Select ROWs
2 Click Data Entry > Define Routes.
3 If this is the first route to be created, the
Add New Route dialog box opens. Type a name for the new route in the field
Enter Route Name. Then click
 OK
OK (
Figure 8-7).
Figure 8-7. Add New Route
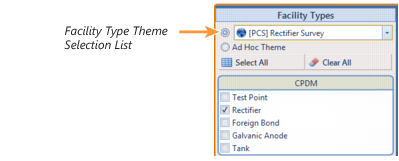
4 Select the facility type(s) you want to work with using the method described in either
step a or
step b:
a To select a facility type, click the facility type option button and then click the down arrow and select a facility type in the list, such as
 [PCS] Rectifier Survey
 (
Figure 8-8).
Figure 8-8. Facility Type Theme Option
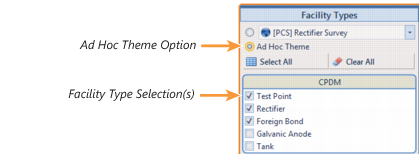
b To select multiple facility types, click the option button
Ad Hoc Theme and then click the check box for one or more facility types, such as
Test Point,
Rectifier, and
Foreign Bond (
Figure 8-9).
Note: An Ad Hoc Theme only applies to the current session and is not saved. A facility type is selected when a check mark appears inside the check box. To clear the check mark, click the check box again.
Figure 8-9. Ad Hoc Theme Option
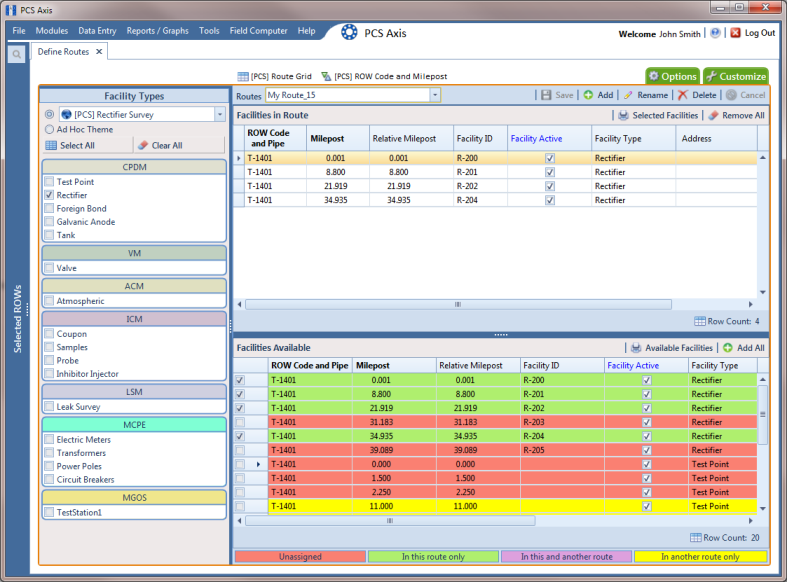
5 Complete the following steps in the
Facilities Available grid (
Figure 8-10):
a Select which facilities to include in the route. To include all facilities, click
 Add All
 and then click
Yes when the
Add All message opens.
To only include facilities you select, click the check box for each facility in the Facilities Available grid. Or double-click each facility.
Note: Selected facilities display in the Facilities in Route grid.
b Click
 Save
Save to save changes. Continue with the
next section to change the order of facilities in the route.
Figure 8-10. Define Routes