Quick Start
Information in this section assumes one or more routes have previously been created. If no routes exist, skip this section and begin with
Creating a Route.
The following procedure explains how to display and set properties in a route. Property settings include selection of a layout and sort theme. Both of these themes determine how PCS Axis displays facility records in a route.
As an option, you can also set up one or more filter groups that apply only to the current session. A filter group filters data in a route by including or excluding certain facility records. It allows you to work with a subset of facility records for the currently selected ROW based on filter selection criteria.
Complete the following steps:
1 Select one or more pipeline segments in the
Select ROWs window. Select pipeline segment(s) with facilities you want to include in the route. Click
 Save
Save to close the window.
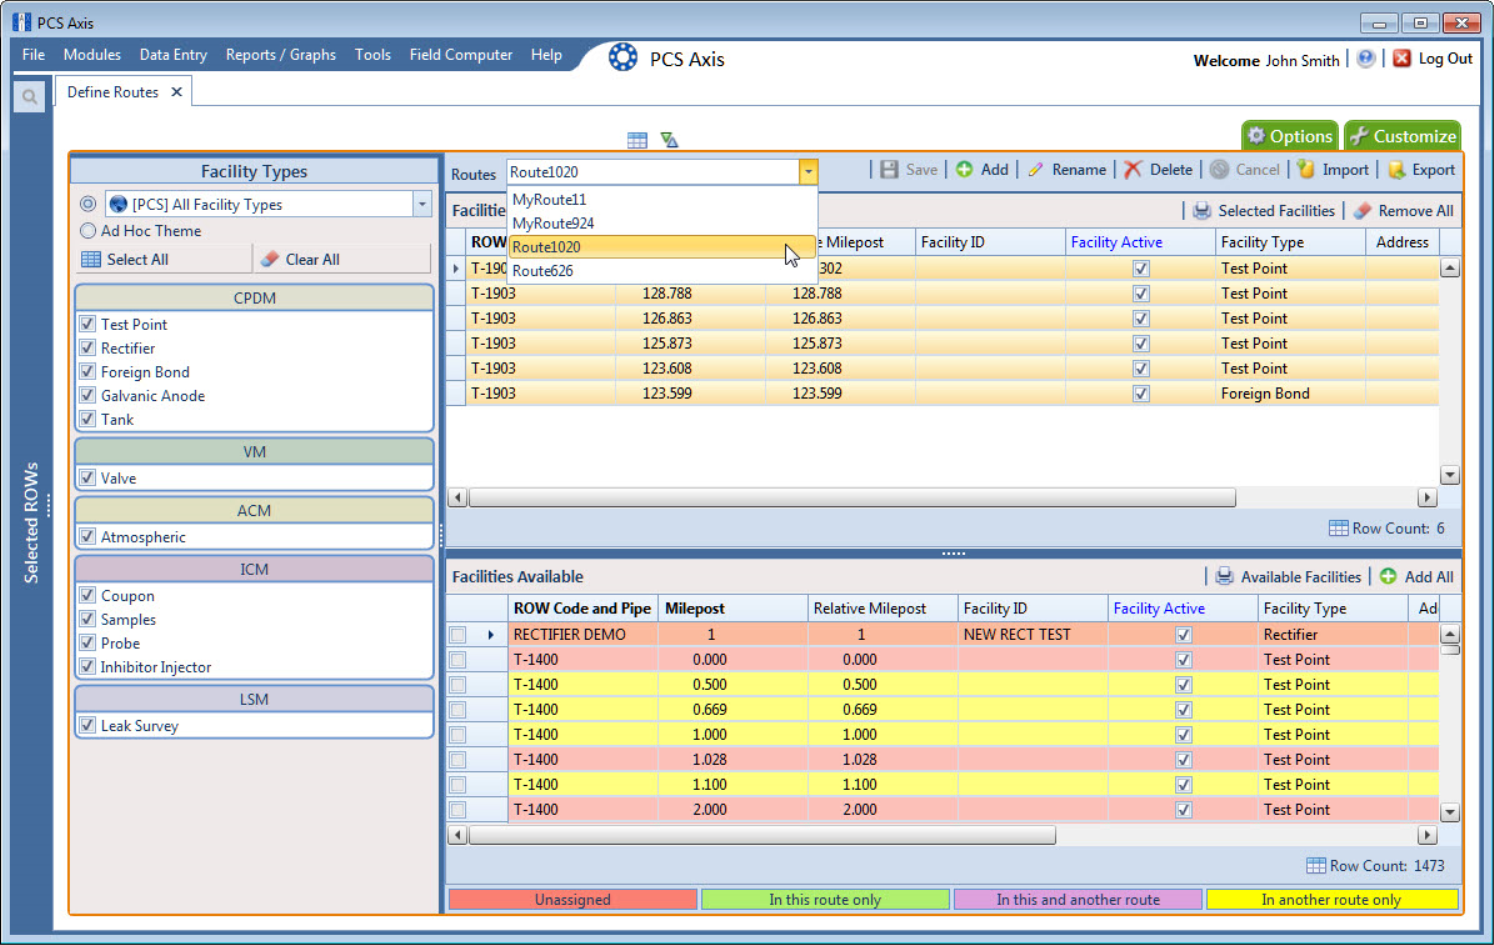
2 Click Data Entry > Define Routes to open the Define Routes window.
3 Click the down arrow in
Routes and select a route in the selection list (
Figure 8-1).
Figure 8-1. Define Routes Selection List
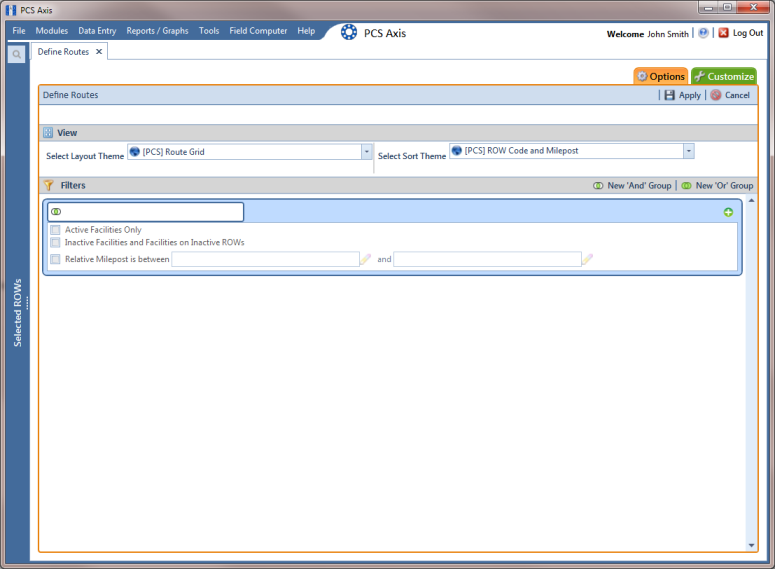
4 Click the
Options tab

to open the options page (
Figure 8-2).
Figure 8-2. Options
5 Select a layout and sort theme. Click the down arrow in the field Select Layout Theme and select a layout theme. Then click the down arrow in the field Select Sort Theme and select a sort theme.
6 If you want to filter records in the grid and route, complete the following steps. Otherwise, click
 Apply
Apply to save and apply changes. PCS Axis closes the options page and returns to the
Define Routes window.
Clicking
 Cancel
 allows you to close the options page without saving and applying changes.
Important: Filter settings in the options page of
Define Routes apply only to the current session and are not saved. See
Working with Themes and Filter Groups for information about saving filter settings in a theme.
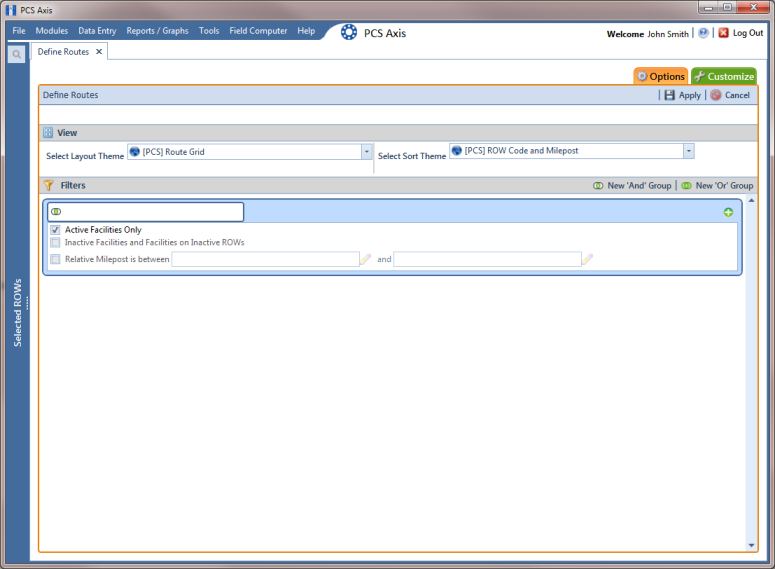
a Click the check box of one or more options in
Filters and then click
 Apply.
 For example, click
Currently Active Facilities Only to only include active facilities (
Figure 8-3).
Figure 8-3. Filters
A check mark inside a check box indicates a selection. To clear a selection, click the check box again to remove the check mark.
b If you want to add a filter, click the
 Add
Add button and then use filter selection fields to set up filter criteria. Select a PCS Axis field, operator, and one or more filter conditions. Then click
 Apply
Apply to save and apply changes.
PCS Axis closes the options page and returns to the Define Routes window.
c If you want to add a new AND or OR filter group, continue with one of the following steps:
• To add a new AND filter group continue with
step 7.
• To add a new OR filter group continue with
step 8.
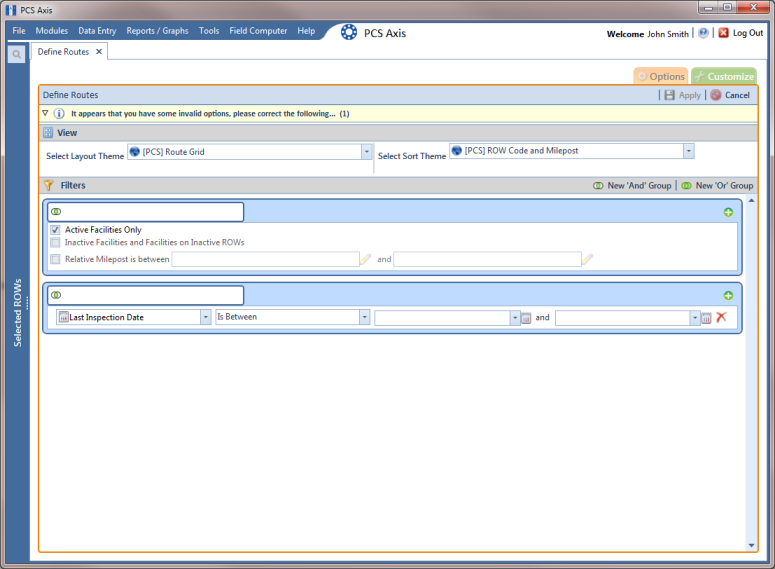
7 If you want to add a new AND filter group, complete the following steps. With an AND filter group, PCS Axis includes a subset of records that meet
all filter conditions defined for the filter group. Records are filtered in the grid and in the route (
Figure 8-4).
Figure 8-4. New ‘And’ Filter Group
a Click
 New ‘And’ Group
 to open the filter properties group box.
b Use filter selection fields to set up filter criteria. Select a PCS Axis field, operator, and one or more filter conditions.
When adding a date filter, such as Last Inspection Date Is Between, set a date range using one of the following methods:
1) Type a date in the start and end date fields. Enter a start and end date using the format M/DD/YYYY to indicate the month, day, and year.
2) To set a date range using a calendar, click the down arrow in the start date field to open a calendar and select a start date. Then click the down arrow in the end date field to open a calendar and select an end date.
3) To set a date range using dynamic start and end dates, click the

calculator button in the start date field and set up dynamic date properties. Repeat this step for the end date field. Clicking the calculator button opens and closes dynamic date property fields.
Note: Clicking the

toggle button in the

information bar displays important information related to required settings.
c Click
 Apply
Apply to save and apply changes. PCS Axis closes the options page and returns to the
Define Routes window.
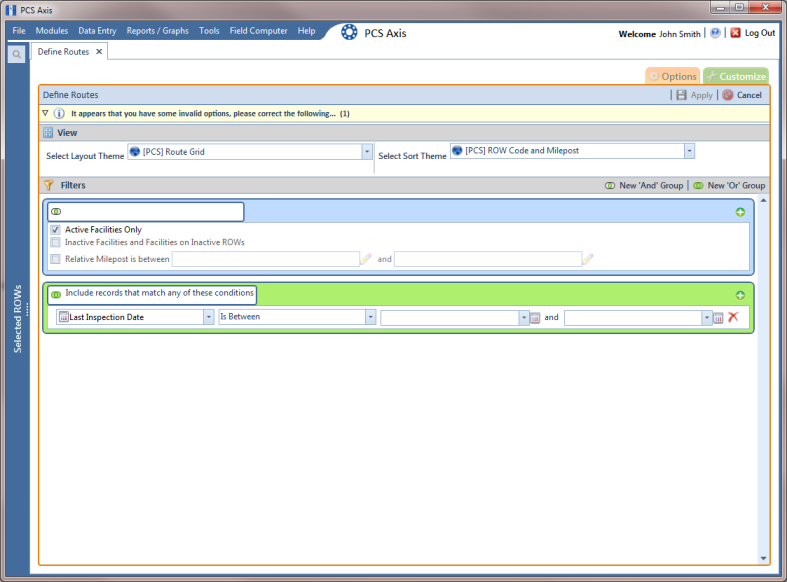
8 If you want to add a new OR filter group, complete the following steps. With an OR filter group, PCS Axis includes a subset of records that meet any filter condition defined for the filter group. Records are filtered in the grid and in the route:
a Click
 New ‘Or’ Group
 to open a filter properties group box (
Figure 8-5).
Figure 8-5. New ‘Or Filter Group
b Use filter selection fields to set up filter criteria. Select a PCS Axis field, operator, and one or more filter conditions.
When adding a date filter, such as Last Inspection Date Is Between, set a date range using one of the following methods:
1) Type a date in the start and end date fields. Enter a start and end date using the format M/DD/YYYY to indicate the month, day, and year.
Clicking the

toggle button in the

information bar displays important information related to required settings.
2) To set a date range using a calendar, click the down arrow in the start date field to open a calendar and select a start date. Then click the down arrow in the end date field to open a calendar and select an end date.
3) To set a date range using dynamic start and end dates, click the

calculator button in the start date field and set up dynamic date properties. Repeat this step for the end date field. Clicking the calculator button opens and closes dynamic date property fields.
c Click
 Apply
Apply to save and apply changes. PCS Axis closes the options page and returns to the
Define Routes window.