Adding the Attached Document Field in the Grid
If the Attached Document field is not present in the Information or Maintenance grid of Edit ROW Details, complete the following steps to add the field:
1 Select one or more pipeline segments you want to work with in the
Select ROWs window. Click
 Save
Save to close the window.
2 Click
Data Entry >
Edit ROW Details to open the
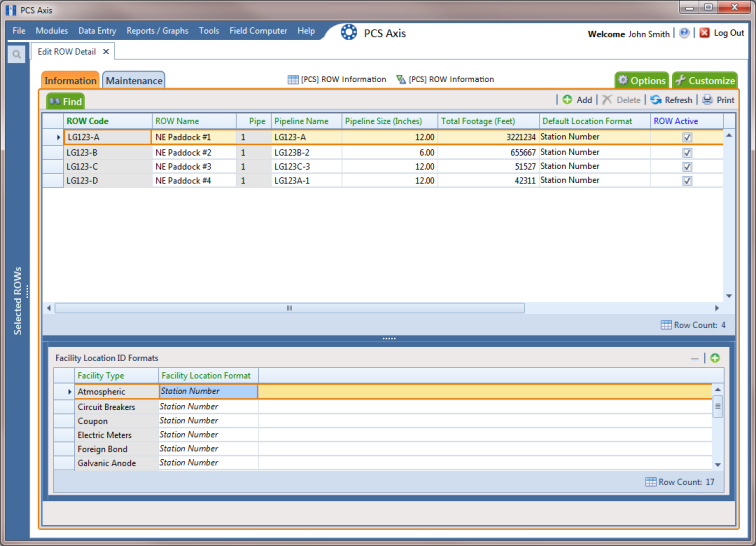
Edit ROW Detail window (
Figure 4-23).
Figure 4-23. Edit ROW Detail
3 If you want to collapse the
Selected ROWs panel to view more of the
Edit ROW Detail grid, click
Selected ROWs. To expand the panel, click
Selected ROWs again (
Figure 4-23).
4 Based on the grid you want to add the
Attached Document field, click the
Information 
or
Maintenance 
tab if either of these grids is not visible.
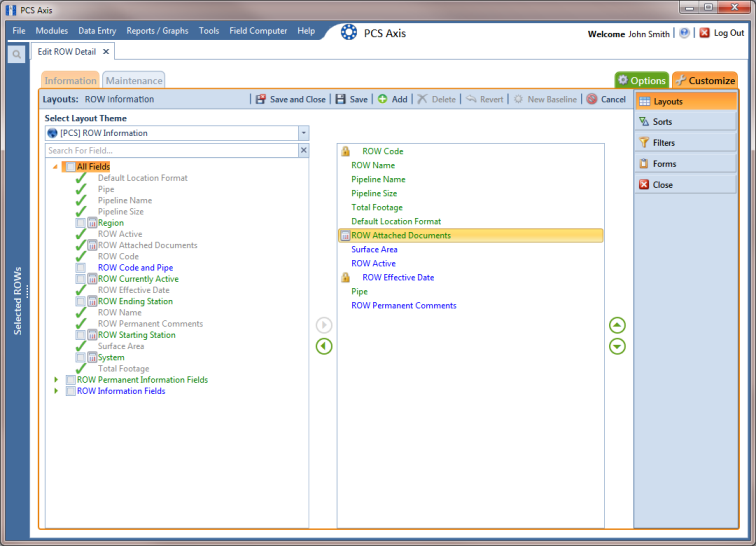
5 Click the
Customize tab

to view the
Layouts page (
Figure 4-24).
6 Choose a grid layout theme. Click the down arrow in Select Layout Theme and select a layout theme in the selection list.
7 Double-click
 All Fields
 in the left pane of the window to view a list of fields available for selection.
8 Add the field
ROW Attached Documents in the layout theme. Double-click
ROW Attached Documents in the left pane of the
Layouts page to move it to the right pane. Add other fields as required. The layout theme includes all fields listed in the right pane (
Figure 4-24).
9 To change the order of fields listed in the right pane and subsequently in the grid, click and drag a field to a new position in the list. Or, select a field and then click the

up or

down button.
10 Click
 Save and Close
 to save changes and return to the grid.
Figure 4-24. Layouts