Editing and Arranging Filter Groups
PCS Axis processes filters in a filter group in descending order beginning with the filter at the top of the filter group. Information in this section explains how to edit filter property settings and also how to arrange filters in a group of filters.
Complete the following steps:
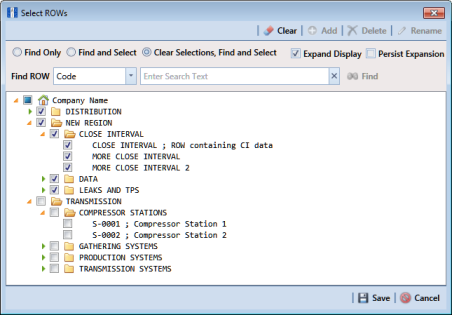
1 Select one or more pipeline segments in the
Select ROWs window (
Figure 16-53). Click
 Save
Save to close the window.
Figure 16-53. Select ROWs
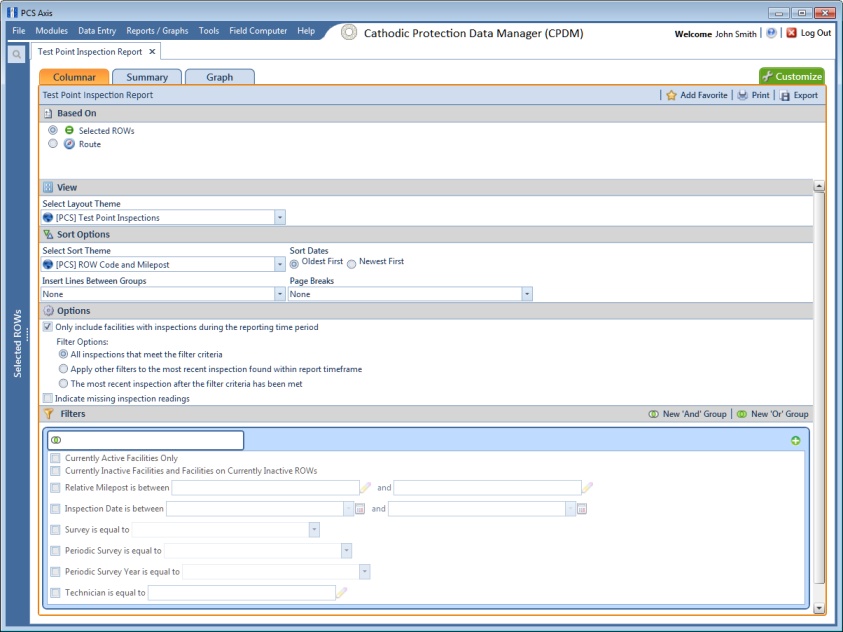
2 Select the report you want to work with in the
Reports/Graphs menu. Click
Report/Graphs and then select a report, such as
Test Point Inspection Report, to open the report options window (
Figure 16-54).
Figure 16-54. Report Options
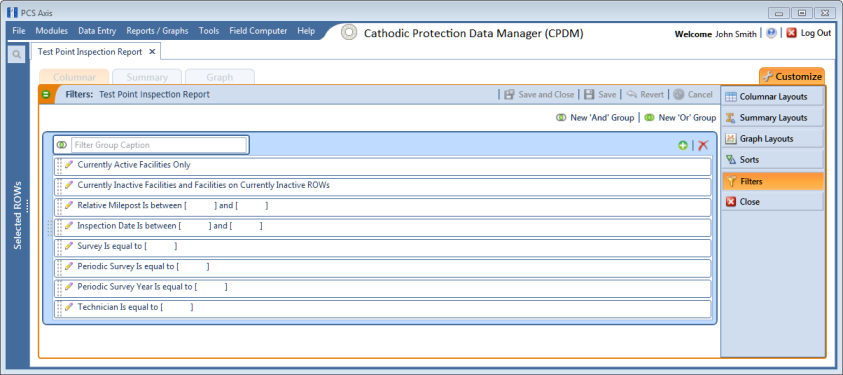
3 Click the
Customize tab

then the
Filters button

to open the
Filters page (
Figure 16-55).
Figure 16-55. Filters
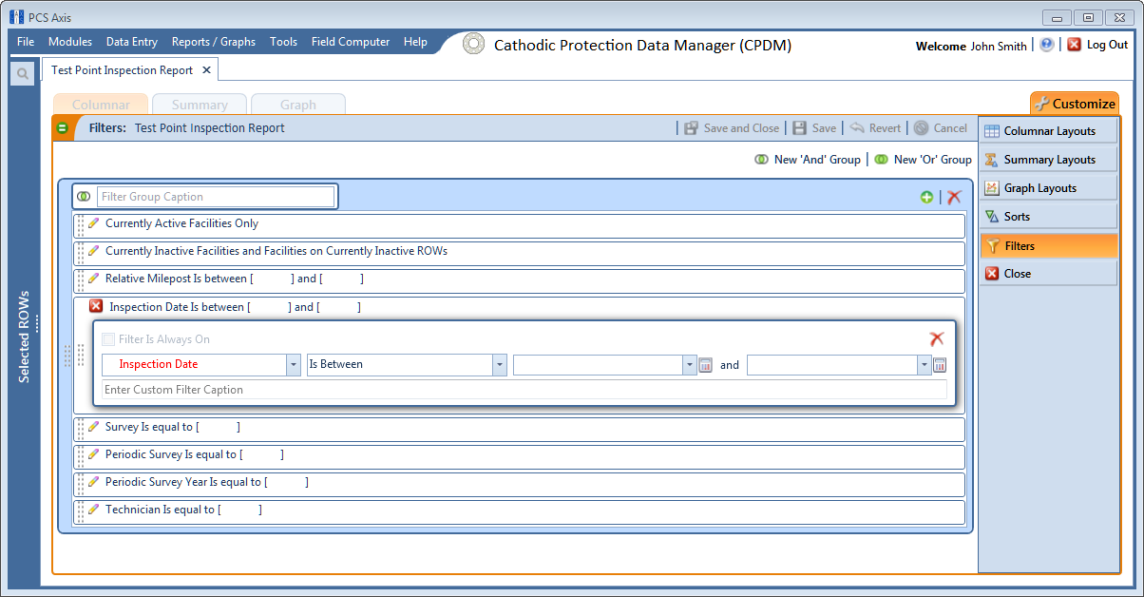
4 Click the edit icon

to display a filter’s property settings. In the following example, property settings for
Inspection Data Is between are visible (
Figure 16-56).
Figure 16-56. Inspection Date Is Between
5 To delete a filter in a filter group, click the

delete button.
6 To rename the filter, type a description in the field Enter Custom Filter Caption.
7 To change filter criteria, use filter selection fields to select a PCS Axis field, operator, and one or more filter conditions. When adding a date filter, such as Inspection Date Is Between, set a date range using a calendar or dynamic dates in the following manner:
a To set a date range using a calendar, click the down arrow in the start date field to open a calendar and select a date. Repeat this step for the end date field.
b To set a date range using dynamic start and end dates, click the

calculator button in the start date field and set up dynamic date properties. Repeat this step for the end date field. Clicking the calculator button opens and closes dynamic date property fields.
8 To enable the filter for all sessions of the report, click the check box Filter is Always On to place a check mark inside the check box. When this check box is not selected, toggle the filter on and off in the report options page using the filter’s check box.
9 Click the

close button to close the filter’s property settings group box.
10 To move a filter to a different position in a filter group, or to move a filter group to a different position, follow these steps:
a Point the mouse at the handle

of a filter or filter group to display a vertical resize cursor

.
b Drag and drop the filter or filter group to a new location.
Note: PCS Axis processes filters in descending order beginning with the filter at the top of the filter group.
11 Click
 Save and Close
 to return to the report options window.