Previewing a Route
Information in this section describes how to view, print, and export a route with selected or available facilities.
Selected facilities are those included in the route. These facilities are also listed in the
Facilities in Route grid of the
Define Routes window (
Figure 8-73). Available facilities are linked to the current ROW selection, but are
not included in the route. Available facilities are listed in the
Facilities Available grid of the
Define Routes window.
Complete the following steps:
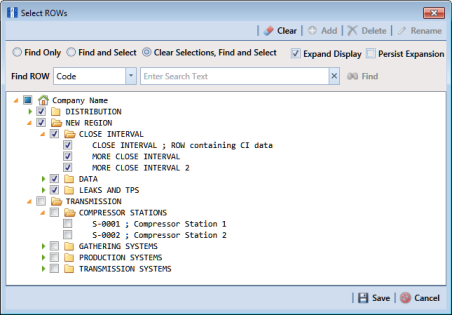
1 Select one or more pipeline segments in the
Select ROWs window (
Figure 8-72). Click
 Save
Save to close the window.
Figure 8-72. Select ROWs
2 Click Data Entry > Define Routes to open the Define Routes window. Click the down arrow in the Routes field and select a route in the selection list.
3 To view selected facilities in a
Print Preview window (
Figure 8-73), click the
 Selected Facilities
 button in the
Facilities in Route grid.
To view available facilities in a Print Preview window, click the
 Available Facilities
 button in the
Facilities Available grid.
Clicking
 Selected Facilities
 allows you to view a report with facilities included in the route. Clicking
 Available Facilities
 opens a report with facilities listed in the
Facilities Available grid.
4 Click the
 Print
Print button to open the
Print dialog box and select a printer to print the route. Or, click the
 Quick Print
 button to print the route using the default printer set up in Windows.
5 If you want to export the route, click the
 Export Document
 button and select any of the following file formats: PDF, HTML, MHT, RTF, XLS, XLSX, CSV, TXT, IMG, and XPS.
6 Click the
 Close
Close button to close the
Print Preview window and return to the
Define Routes window.
Figure 8-73. Print Preview