Activating Facility Inspection Fields for Data Entry
Inspection fields with Activate in the field description must first be added and enabled in the facility Information grid to allow data entry of inspection readings in the facility Inspection grid.
To activate facility inspection fields for data entry, follow these steps:
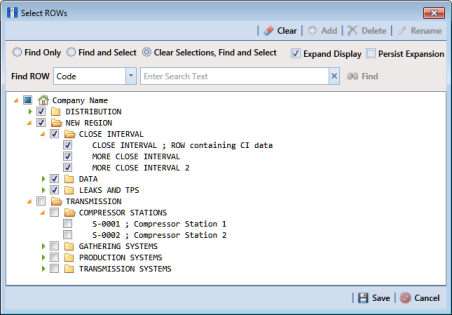
1 Select one or more pipeline segments in the
Select ROWs window (
Figure 7-122). Select pipeline segments with facilities you want to work with, then click
 Save
Save to close the window.
Figure 7-122. Select ROWs
2 Open the Edit <module> Data window. For example, click Data Entry > Edit CPDM Data to open the Edit CPDM Data window.
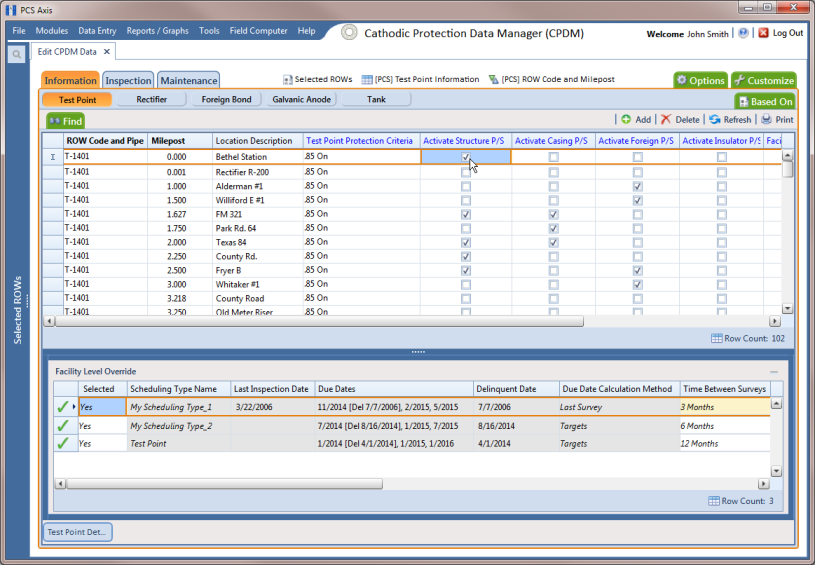
3 Open the
Information grid for a facility type. For example, click the
Information tab

and then a facility type button, such as
Test Point 
(
Figure 7-123).
Figure 7-123. Information Grid - Test Point Tab
4 If you want to collapse the Selected ROWs panel to view more of the grid, click the Selected ROWs bar. Clicking the bar again expands the panel.
5 Click the check box of an Activate inspection field for a facility in the grid to place a check mark in the check box. For example, click the check box Activate Structure P/S (Volts) for a facility in the grid.
6 Click Yes to apply the change when a warning message displays to notify you of a change to the facility’s permanent history record.
The inspection field is now available for data entry in the
Inspection grid for the selected facility. If the inspection field is not present in the Inspection grid, refer to
Adding a Data Grid Layout Theme for information about adding fields in a grid.
Note: You can also activate an inspection field in the Inspection grid by right-clicking the field and selecting Activate Item in the shortcut menu that opens.