Adding a Sort Theme
A sort theme determines how PCS Axis sorts records in the data entry grid. Adding a sort theme allows you to select which field(s) to sort records by and if records sort alphanumerically in ascending or descending order.
To add a sort theme, follow these steps:
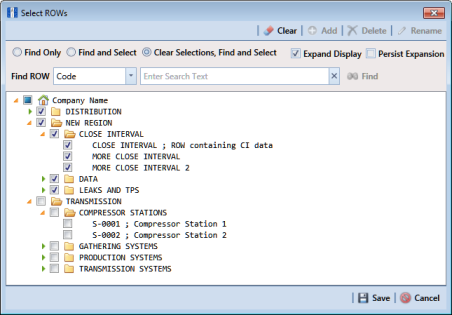
1 Select one or more pipeline segments in the
Select ROWs window (
Figure 7-109). Click
 Save
Save to close the window.
Figure 7-109. Select ROWs
2 Open the Edit <module> Data window. For example, click Data Entry > Edit CPDM Data to open the Edit CPDM Data window.
3 Open the data entry grid that you want to add a new grid sorting theme. For example, click the
Inspection tab

and then the
Test Point button

to display the
Test Point Inspection grid.
4 If you want to collapse the Selected ROWs panel to view more of the grid, click the Selected ROWs bar. Clicking the bar again expands the panel.
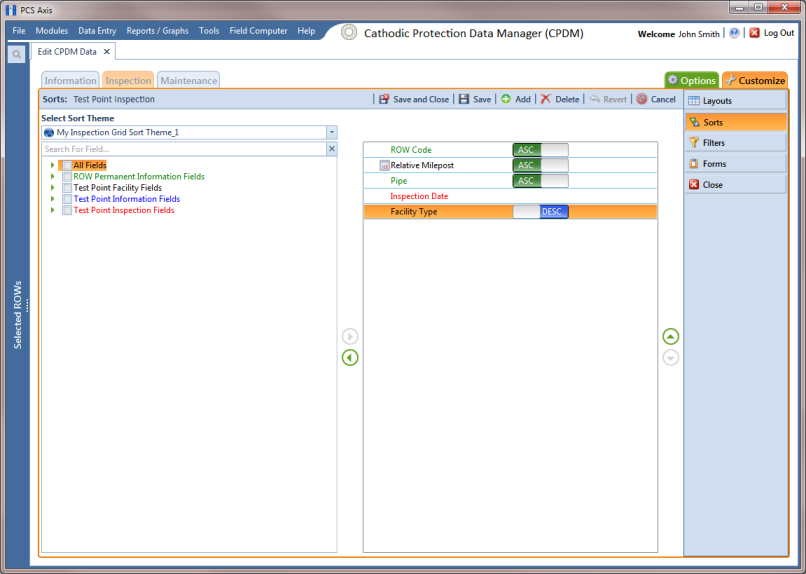
5 Click the
Customize tab

then the
Sorts button

to open the
Sorts page (
Figure 7-110).
Figure 7-110. Sorts
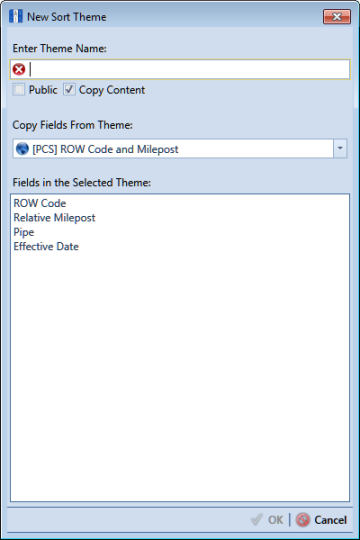
6 Click the
 Add
Add button to open the
New Sort Theme dialog box (
Figure 7-111).
Figure 7-111. New Sort Theme
7 Type a name for the layout theme in the field Enter Theme Name (required).
8 If you want to create a public theme, click the Public check box to place a check mark inside the check box. When the check box is empty, the layout saves as a private theme.
Note: Themes are either public or private. A public theme is available for use by all PCS Axis users. A private theme is available only to the user who creates it.
9 If you want to copy fields from an existing layout theme, click the Copy Content check box to place a check mark inside the check box. Then click the down arrow in the field Copy Fields From Theme and select a theme in the selection list.
If you do not want to copy fields from an existing layout theme, remove the check mark inside the Copy Content check box by clicking the check box.
10 Click
 OK
OK to save changes and return to the
Sorts page.
11 Complete the following steps to add and remove fields in the new sorting theme as needed:
a Click the toggle arrow

for a field category in the left pane of the window to view a list of fields available for selection. For example, click
 All Fields
 (
Figure 7-112).
Figure 7-112. Sorts Theme: All Fields
b Double-click a field listed in the left pane to move it to the right pane. (Clicking the top arrow button

also moves the selected field.) Repeat this step as needed. The sorting theme includes all fields listed in the right pane.
c If you want to remove a field in the sorting theme, double-click a field listed in the right pane to move it to the left pane. (Clicking the bottom arrow button

also moves the selected field.) Repeat this step as needed.
12 Select a sorting method for each field listed in the right pane. To sort grid records in ascending order, click the toggle button to select
ASC 
. To sort in descending order, click the toggle button to select
DESC 
.
13 To change the order of fields listed in the right pane and subsequently in the grid, click and drag a field to a new position in the list. Or, select a field and then click the up

or down

button.
14 Click
 Save and Close
 to save changes and return to the data entry grid.
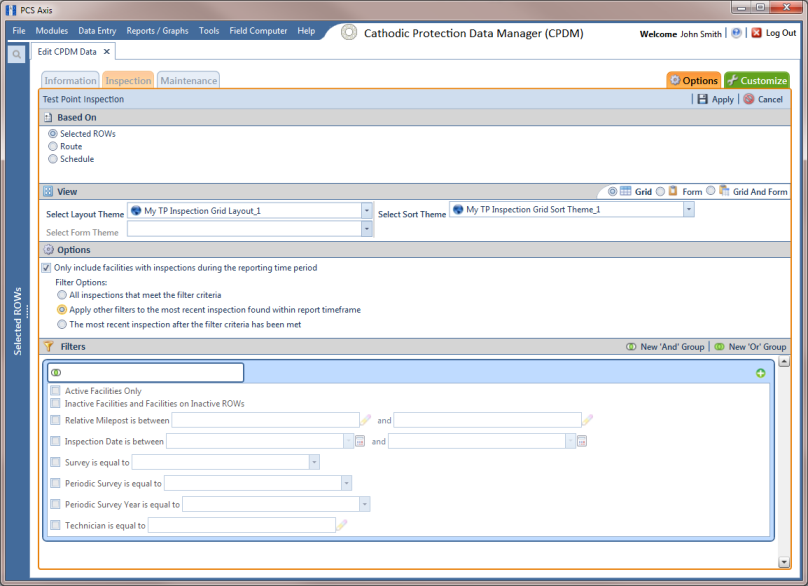
15 To apply the new sorting theme to the data entry grid, follow these steps:
a Click the
Options tab

to open the options page.
b Click the down arrow in the field
Select Sort Theme and select the new sorting theme in the selection list (
Figure 7-113).
16 Click
 Apply
Apply to apply changes and return to the data entry grid.
Figure 7-113. Apply Sort Theme