Printing, Exporting, or Emailing a Continuous Survey
The following information explains how to print, export, or email a report for a continuous survey displaying in the Edit ISM Data grid. Supported file formats for exporting a report include PDF, HTML, MHT, RTF, XLS, XLSX, CSV, TXT, and Image (BMP, EMF, WMF, GIF, JPEG, PNG, and TIFF).
Complete the following steps:
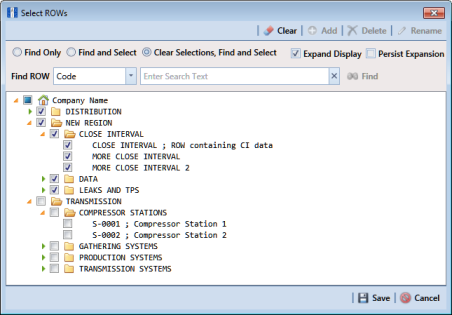
1 Click the
Select ROWs button

to open the
Select ROWs window (
Figure 7-102). Select the pipeline segment(s) with the facilities you want to work with, then click
 Save
Save to close the window.
Figure 7-102. Select ROWs
Note: If you want to collapse the Selected ROWs panel, click the Selected ROWs bar. Clicking the bar again expands the panel.
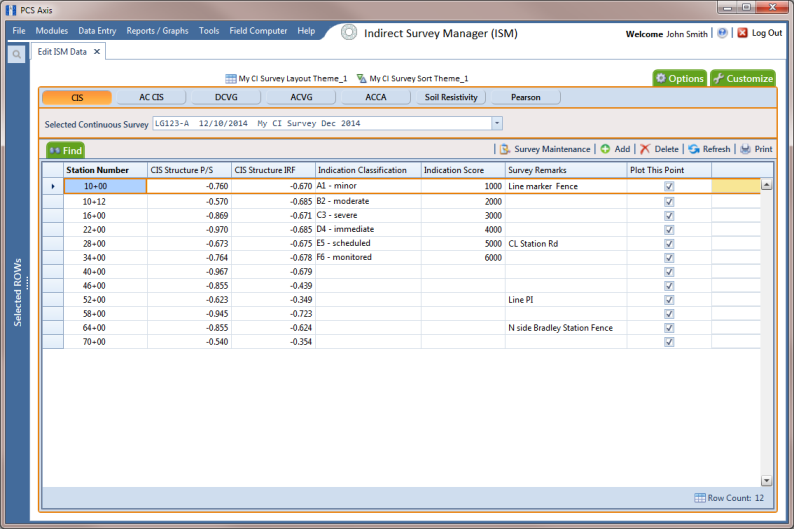
2 If the ISM module is not open, click Modules > Indirect Survey Manager (ISM).
3 Click
Data Entry >
Edit ISM Data to open the ISM data entry grid. Then click a button labeled with the type of continuous survey data you want to work with, such as the
CIS button

(
Figure 7-103).
4 Select a survey folder with survey readings you want to print or export. Click the down arrow in Selected Continuous Survey and select a survey folder in the selection list.
Figure 7-103. Edit ISM Data
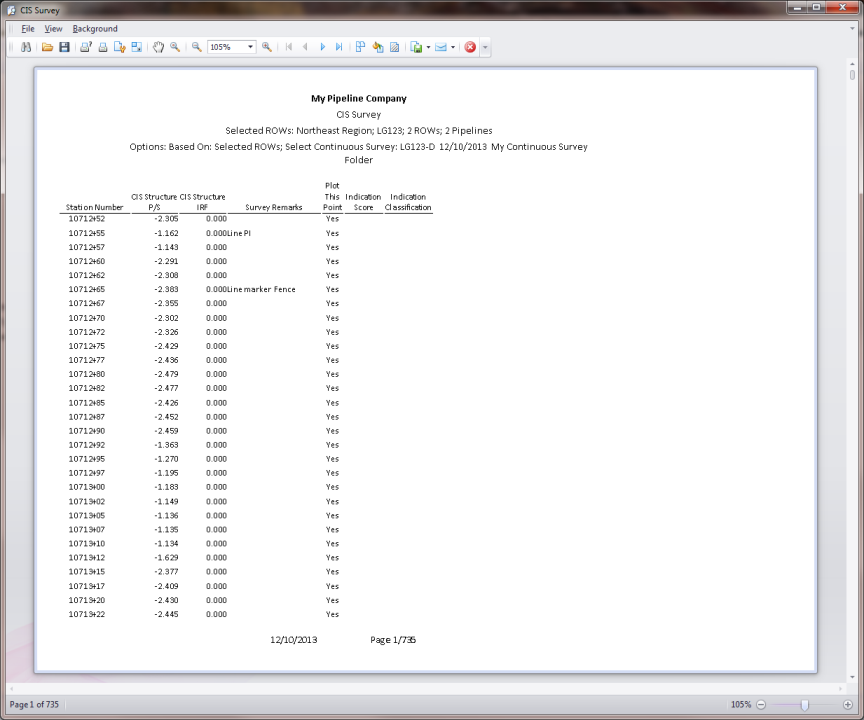
5 Click
 Print
Print to open a print preview window (
Figure 7-104).
6 To print the report using the default Windows printer, click
 Quick Print
.
7 To open a print dialog box and select a printer to print the report, click
 Print
Print.
Figure 7-104. Print Preview
8 To select a file format and export the report, follow these steps:
a Click the down arrow in
 Export Document
 and select a file format in the selection list.
b When the Options dialog box opens, set up optional property settings and then click OK to close the dialog box.
c When the Save As dialog box opens, type a name for the report in the File name field and then navigate to a location on your computer to save the report.
d Click Save. When the message Do you want to open this file displays, click Yes or No.
9 To send the report as an attachment in an email, follow these steps:
a Click the down arrow in
 Send via E-mail
 and select a file format in the selection list.
b When the Options dialog box opens, set up optional property settings and then click OK to close the dialog box.
c When the Save As dialog box opens, type a name for the report in the File name field and then navigate to location on your computer to save the report. Click Save.
d When an email message opens with the report as an attachment, select an email recipient and then click Send.
10 Click
 Exit
Exit to close the print preview window and return to the data entry grid.