Adding or Deleting a Record in a Continuous Survey
To add or delete a record in a continuous survey, follow these steps:
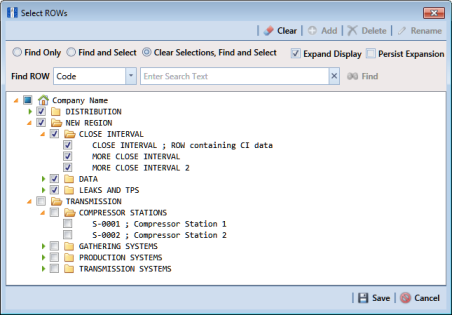
1 Click the
Select ROWs button

to open the
Select ROWs window (
Figure 7-69). Select the pipeline segment(s) with the facilities you want to work with, then click
 Save
Save to close the window.
Figure 7-69. Select ROWs
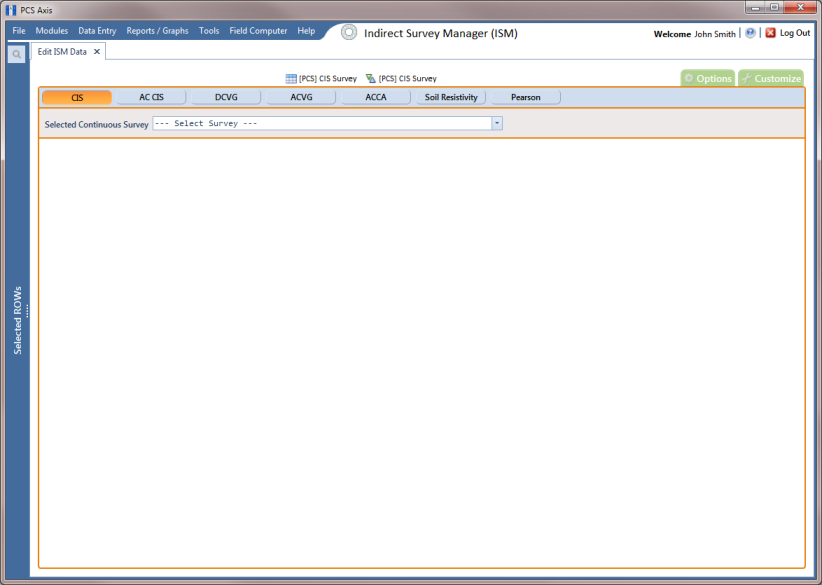
2 If the ISM module is not open, click Modules > Indirect Survey Manager (ISM).
3 Open the ISM data entry grid. Click
Data Entry >
Edit ISM Data (
Figure 7-70).
Figure 7-70. Edit ISM Data
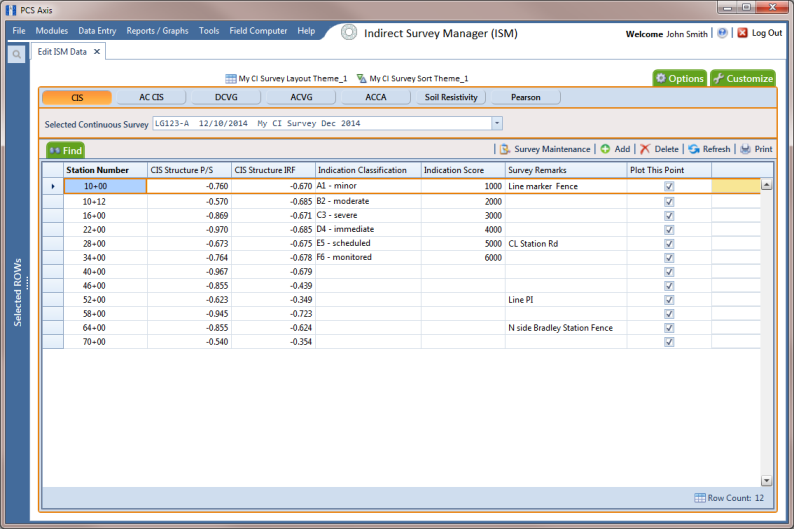
4 Click the button labeled with the type of continuous survey data you want to work with, such as the
CIS button

(
Figure 7-71).
Figure 7-71. Edit ISM Data
5 Select a survey folder with survey readings you want to modify. Click the down arrow in Selected Continuous Survey and select a survey folder from the list.
6 If you want to collapse the Selected ROWs panel to view more of the grid, click the Selected ROWs bar. Clicking the bar again expands the panel.
7 To add a record in a survey, follow these steps:
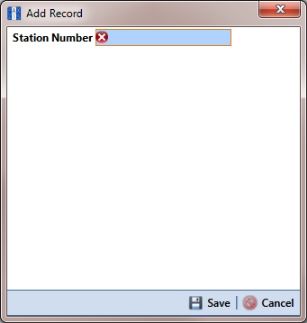
a Click
 Add
Add to open the
Add Record dialog box (
Figure 7-72).
b Type a survey location in the Station Number field. This field is required.
Figure 7-72. Add Record
c Click
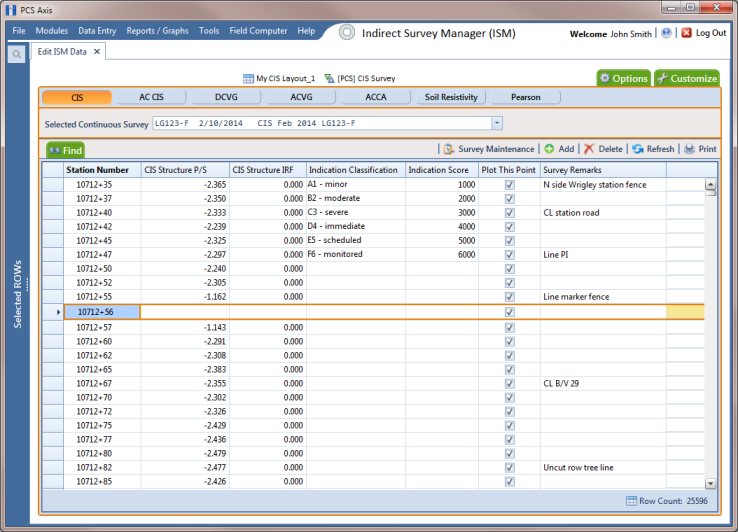
Save to add the record in the grid. For example, a record for station number 10712+56 has been added in the next figure (
Figure 7-73).
Figure 7-73. Edit ISM Data
d Provide survey data as needed. For example, type a survey reading in the CIS Structure P/S field and remarks in the Survey Remarks field.
e Click
 Refresh
 to update the grid.
8 To delete a record in a survey:
a Click a station number to select a row of records in the Edit ISM Data grid.
b Click
 Delete
.
c When the
Delete Record message opens, click
 Delete
 to delete the selected record. Clicking
 Cancel
 cancels the operation.
d When the following Warning message displays, click Yes to delete the survey record:
Delete selected survey reading record? This action cannot be undone?
e Click
 Refresh
 to update the grid.