Building a Survey in the Inspection Grid
Building a survey in the inspection grid based on a schedule allows PCS Axis to automatically add empty inspection records in the grid ready for data entry. This feature saves time by eliminating the need to manually add empty inspection records in the grid, one-by-one.
To build a survey in the Inspection grid based on a schedule, follow these steps:
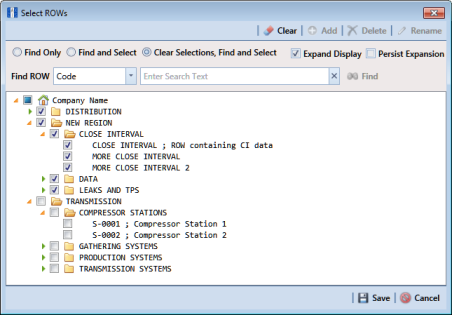
1 Select one or more pipeline segments in the
Select ROWs window (
Figure 7-53). Select pipeline segments with facilities you want to work with, then click
 Save
Save to close the window.
Figure 7-53. Select ROWs
2 Open the
Edit <module> Data window. For example, click
Data Entry >
Edit CPDM Data to open the
Edit CPDM Data window (
Figure 7-54).
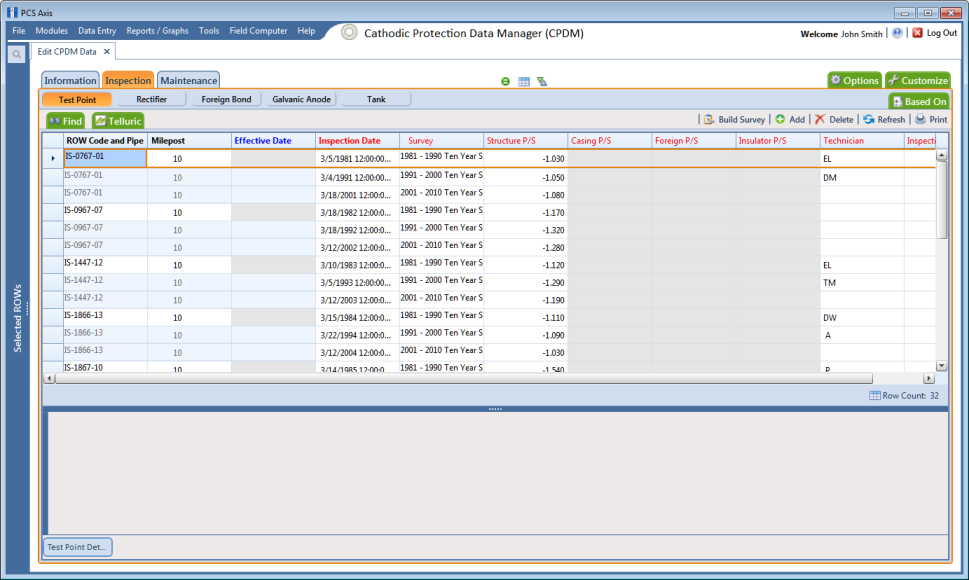
Figure 7-54. Test Point Inspection Grid
3 Select the
Inspection data entry grid for a facility type. For example, click the
Inspection tab

and then the
Test Point button

to display the
Test Point Inspection data entry grid.
4 If you want to collapse the Selected ROWs panel to view more of the grid, click the Selected ROWs bar. Clicking the bar again expands the panel.
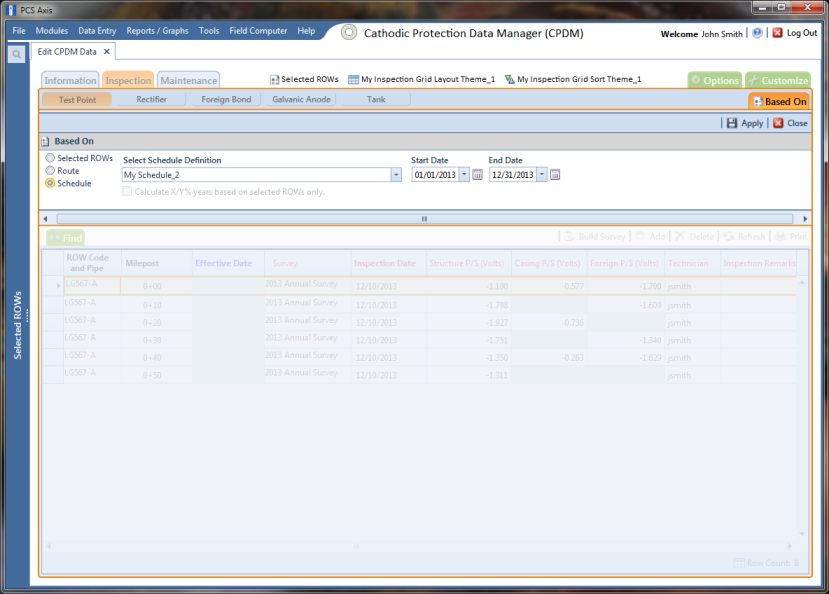
5 Click the
Based On tab

to open the based on panel. Then select the
Schedule option (
Figure 7-55).
Figure 7-55. Based On Schedule Option
6 Select a schedule definition. Click the down arrow in the field Select Schedule Definition and select an item in the list.
Complete
step 7 to set up a schedule date range using a calendar or
step 8 to set up a schedule date range using dynamic dates.
7 To set up a schedule date range using a calendar:
a Set a schedule start date. Click the down arrow in the Start Date field and select a date in the calendar.
b Set a schedule end date. Click the down arrow in the End Date field and select a date in the calendar.
c Click
 Apply
Apply to apply changes and display the data entry grid. To hide the based on panel, click
 Close
Close or click the
Based On 
tab. Continue with
step 9.
8 To set a schedule date range using dynamic start and end dates, follow these steps:
a Click the
Start Date 
calculator to open dynamic start date fields
(Figure 7-56).
Figure 7-56. Based On Schedule
b Set properties in these fields in the following manner:
1) Click the down arrow in the Start Date field and select one of the following options: Today, End Of Month, Beginning Of Year, or End Of Year.
2) In the remaining two fields, type an offset value in the first field and then click the down arrow in the second field and select one of the following options:
Day(s),
Month(s), or
Year(s). Click the

pencil button to close dynamic start date fields.
c Click the
End Date 
calculator to open dynamic end date fields. Set properties in these fields in the following manner:
1) Click the down arrow in the End Date field and select one of the following options: Today, End Of Month, Beginning Of Year, or End Of Year.
2) In the remaining two fields, type an offset value in the first field and then click the down arrow in the second field and select one of the following options:
Day(s),
Month(s), or
Year(s). Click the

pencil button to close dynamic end date fields.
d Click
 Apply
Apply to apply changes and display the data entry grid. To hide the based on panel, click
 Close
Close or click the
Based On 
tab. Continue with
step 9.
9 Click
 Build Survey
 to open the
Build Survey dialog box (
Figure 7-57).
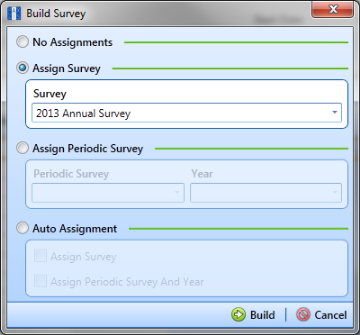
Figure 7-57. Build Survey
10 Select one of the following options in the Build Survey dialog box to assign inspection records to a survey folder:
• No Assignments: Select this option if you do not want to assign inspection records to a survey folder.
• Assign Survey: Select this option to assign inspection records to an annual or multi-year survey folder. Then click the down arrow in the Survey field and select a survey folder in the selection list.
• Assign Periodic Survey: Select this option to assign inspection records to a periodic survey. Click the down arrow in the Periodic Survey field and select a survey folder in the selection list. Then click the down arrow in the Year field and select the survey year.
• Auto Assignment: Select this option and then click either Assign Survey or Assign Periodic Survey and Year to have PCS Axis automatically assign inspection readings to a survey folder based on the schedule date range.
11 Click
 Build
Build. Then click
OK when the
Build Survey message displays “
Build Survey Completed.”
The data entry grid now includes blank inspection records ready for data entry.