Viewing Records Based on a Route
Information in this section explains how to display records in a data entry grid based on a route. A route is a user-created list of facilities for inspection arranged in a particular order. For example, if a route has previously been set up with facilities arranged in survey order, you can work with records in a data entry grid using the same route to display the grid in survey order.
Note: To perform the following procedure, one or more routes must first be set up. For information about how to set up a route, see
Using a Route.
To view records in a grid based on a route, follow these steps:
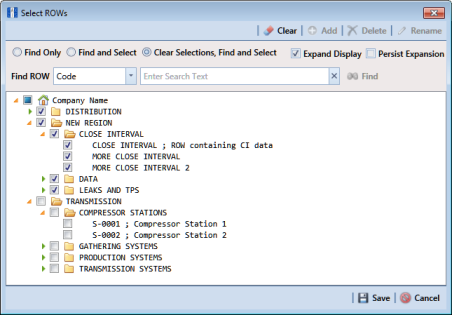
1 Select one or more pipeline segments in the
Select ROWs window (
Figure 7-38). Select pipeline segments with facilities in a route, then click
 Save
Save to close the window.
Figure 7-38. Select ROWs
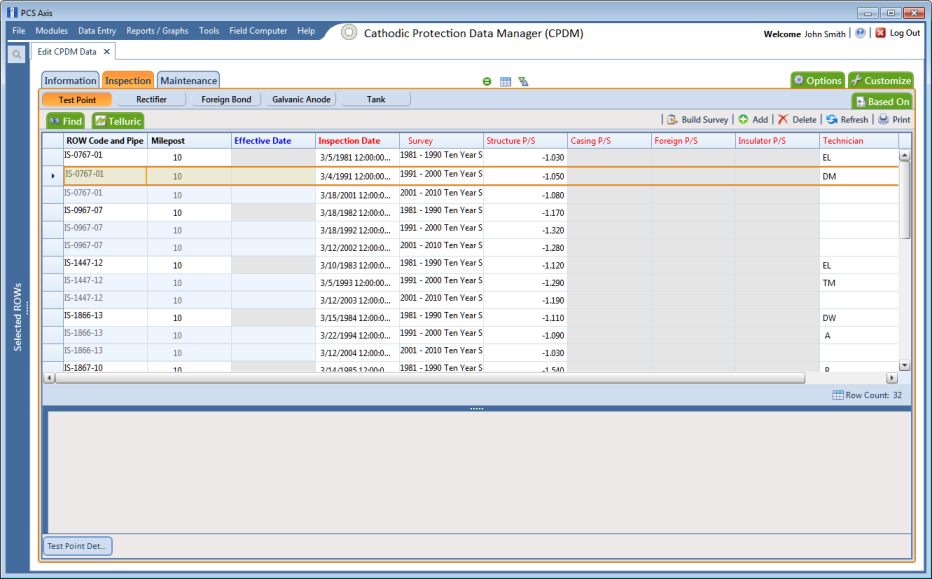
2 Open the Edit <module> Data window. For example, click Data Entry > Edit CPDM Data to open the Edit CPDM Data window.
3 Select a data entry grid. For example, click the
Inspection tab

and then the
Test Point button

to display the
Test Point Inspection data entry grid (
Figure 7-39).
Figure 7-39. Test Point Inspection Grid
4 If you want to collapse the Selected ROWs panel to view more of the grid, click the Selected ROWs bar. Clicking the bar again expands the panel.
5 Complete either
step "a" or
"b" to display records in the grid based on a route:
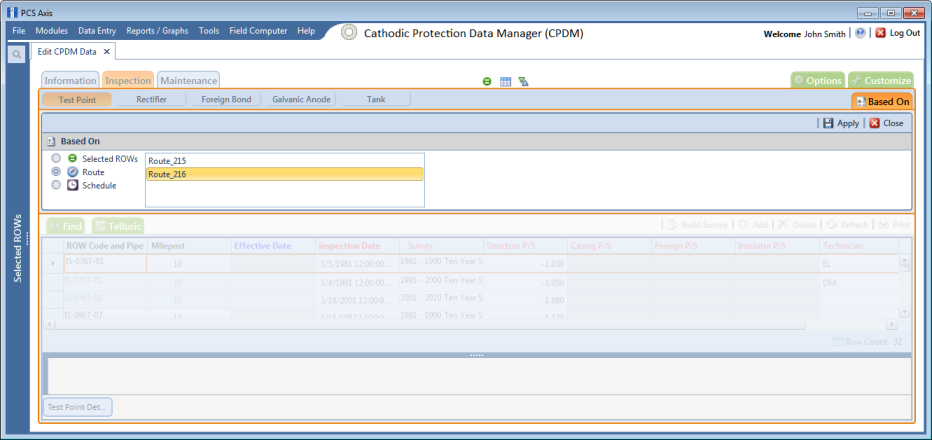
a Click the
Based On tab

to open the based on panel and then complete the following steps:
1) Click the
Route option. Then select a route in the adjacent group box (
Figure 7-40).
Figure 7-40. Based On Route
2) Click
 Apply
Apply, and then click
 Close
Close to close the based on panel.
b Click the
Options tab

to open the options page and then complete the following steps:
1) Click the
Route option. Then select a route in the adjacent group box (
Figure 7-41).
Figure 7-41. Based on Route
2) Click
 Apply
Apply to save and apply changes.
6 If you want to change the grid layout theme, sort theme, or apply one or more filters to the grid, complete the following steps:
a To change the grid layout theme, click the down arrow in the field
Select Layout Theme and select a theme in the selection list (
Figure 7-41).
b To change the grid sort theme, click the down arrow in the field Select Sort Theme and select a theme in the selection list.
c Select a method for sorting records in the data entry grid. Click Oldest First or Newest First in Sort Dates to sort records with the oldest or newest inspection dates first.
d To apply a filter to the grid, click the check box for a filter listed in the Filters group box.
For example, to only include active facilities in the grid, click the Active Facilities Only check box. A check mark inside the check box indicates a selection. To remove a filter from the grid, clear the check mark by clicking the check box.
e When applying a date filter to the grid, such as Inspection Date is between, set a date range using a calendar or dynamic dates in the following manner:
1) To set a date range using a calendar, click the down arrow in the start date field to open a calendar and select a date. Repeat this step for the end date field.
2) To set a date range using dynamic start and end dates, click the

calculator button in the start date field and set up dynamic date properties. Repeat this step for the end date field. Clicking the calculator button opens and closes dynamic date property fields.
f Click
 Apply
Apply to save and apply changes.
Records display in the grid based on selected options.