Adding a Prompt Theme
A prompt theme is similar to a layout theme. It is a named set of fields that provide information and prompt the user for survey data when performing a survey using the Allegro.
Adding a prompt theme allows you to choose which fields to include in the survey file sent to the Allegro. The same prompt theme can include multiple facility types, such as test points, rectifiers, bonds, valves, and so on. Each facility type can also include up to eight pages of prompts. For example, you can include up to 8 pages of inspection prompts for entering facility inspection and maintenance readings.
When viewing the survey file on the Allegro, prompts display in either the top or bottom frame of the window. Information prompts display in the top frame while inspection and maintenance prompts display in the bottom frame. See the Allegro User Guide for more information about working with a survey file on the Allegro.
Note: Only public themes for layouts, sorts, and reports are available for selection. If you would like to use a private theme, your company’s system administrator must make your private theme a public one.
To add a prompt theme, follow these steps:
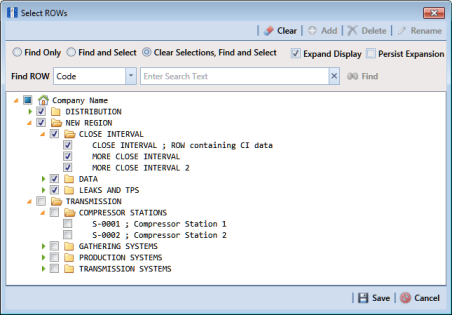
1 Select one or more pipeline segments in the
Select ROWs window (
Figure 13-30). Click
 Save
Save to close the window.
Figure 13-30. Select ROWs
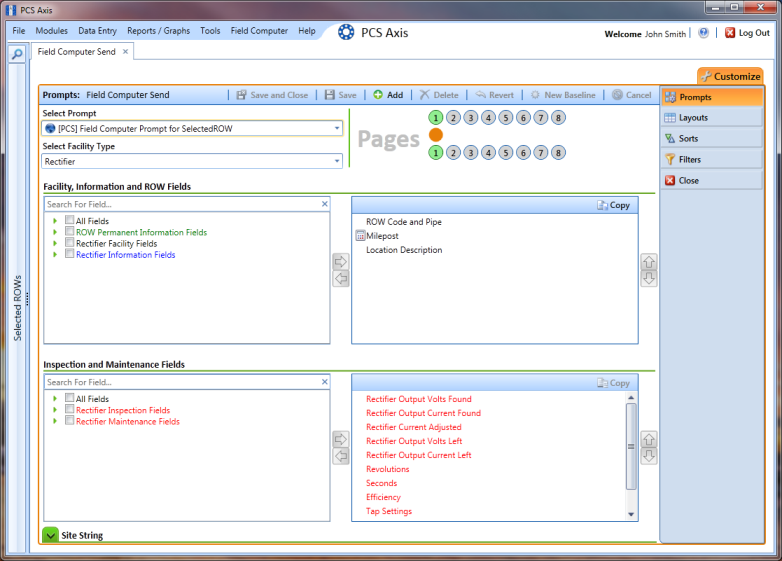
2 Click Field Computer > Send to open the Field Computer Send window.
3 Click the
Customize tab

, then the
Prompts button

to open the
Prompts page (
Figure 13-31).
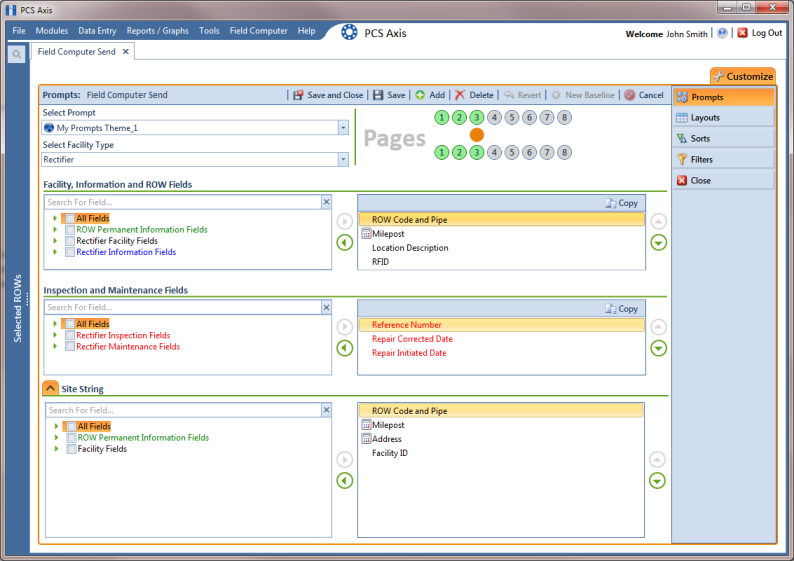
Figure 13-31. Prompts
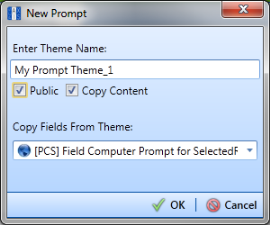
4 Click the
 Add
Add button to open the
New Prompt dialog box (
Figure 13-32).
Figure 13-32. New Prompt
5 Type a name for the prompt theme in the field
Enter Theme Name. Fields marked with

are required.
6 If you want create a public theme, click the Public check box to place a check mark inside the check box. When the check box is empty, the prompt theme saves as a private theme.
7 If you want to copy fields from an existing prompt theme, click the Copy Content check box to place a check mark inside the check box. Then click the down arrow in the field Copy Fields From Theme and select a theme in the selection list.
If you do not want to copy fields from an existing prompt theme, remove the check mark inside the Copy Content check box by clicking the check box.
8 Click
 OK
OK to save changes and return to the
Prompts page.
9 Verify the name of the new theme displays in the Select Prompt field. If not, click the down arrow and select the theme in the selection list.
10 Click the down arrow in the field Select Facility Type and select the facility type you want to work with in the selection list.
11 To add information prompts, follow these steps:
a Double-click
 All Fields
 in
Facility, Information and ROW Fields to view a list of fields available for selection.
b Double-click one or more fields in the selection list to move fields to the right pane. All fields listed in the right pane are included in the prompt theme.
12 To add inspection and maintenance prompts, follow these steps:
a Double-click
 All Fields
 in
Inspection and Maintenance Field.
b Double-click one or more fields in the selection list to move fields to the right pane. All fields listed in the right pane are included in the prompt theme.
13 If you want to remove information, inspection, or maintenance prompts, double-click a field listed in the right pane to move it back to the left pane.
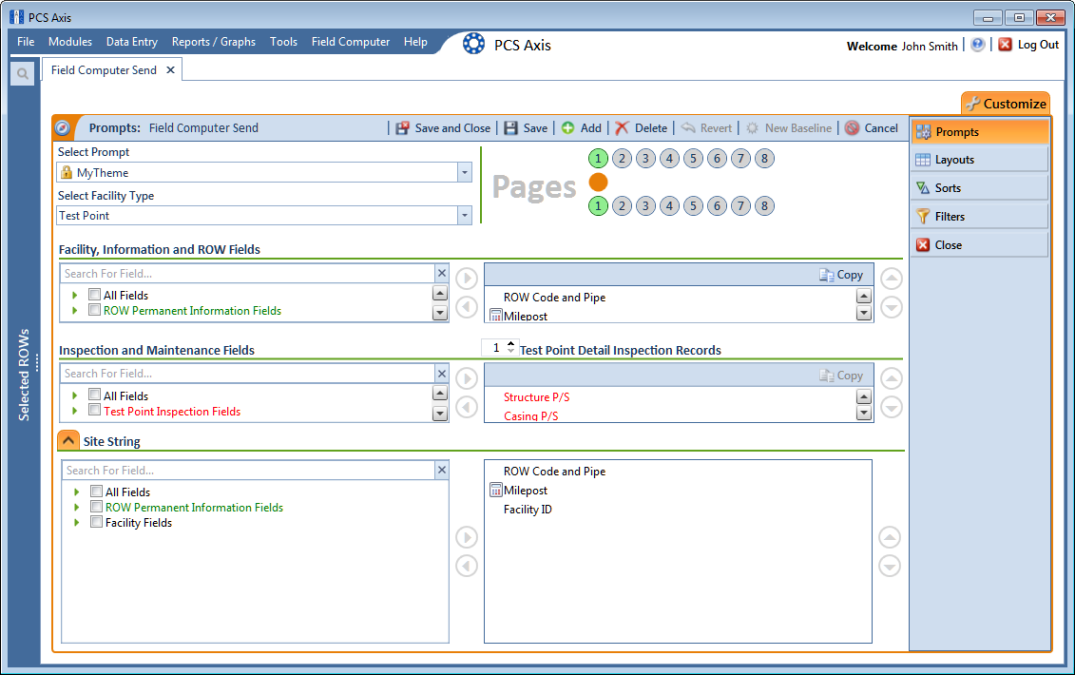
14 Complete the following steps to add site string prompts that help identify one facility from another when using the Allegro. Site string prompts are included with each facility and can be viewed in the Allegro Site List window.
a Click the
 Site String
 tab to view a list of fields available for selection (
Figure 13-33).
Figure 13-33. Site String
b Double-click one or more fields in the selection list to move fields to the right pane. For example, double-click
Address and
Facility ID. Click the
 Site String
 tab again to close the pane.
15 If you want to add another page of prompts, click
 Copy
Copy and then double-click one or more fields as needed in the left pane of
Inspection and Maintenance Fields.
Information fields in
Facility, Information, and ROW Fields automatically copy to each page of prompts. The following example shows three pages of prompts (
Figure 13-34).
Figure 13-34. Prompts
16 Click
 Save and Close
 to save changes and return to the
Field Computer Send window.
17 To apply the new prompt theme to the grid, click the down arrow in the field
Select Prompt and select the theme in the selection list. Then click
 Apply
Apply to update the grid.