Adding a Layout Theme
A layout theme is a group of fields in a grid layout. Adding a new layout theme allows you to choose which fields you want to include in the grid and then save the layout as a theme for later use. The following procedure applies to the grid layout in Field Computer Send.
Note: Only public themes for layouts, sorts, and reports are available for selection. If you would like to use a private theme, your company’s system administrator must make your private theme a public one.
Complete the following steps:
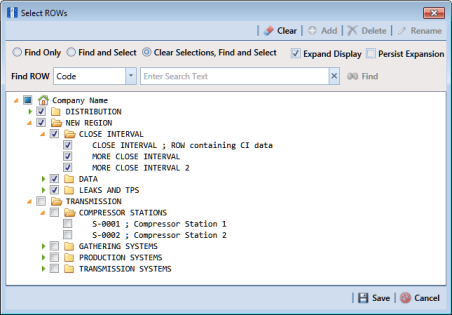
1 Select one or more pipeline segments in the
Select ROWs window (
Figure 13-23). Click
 Save
Save to close the window.
Figure 13-23. Select ROWs
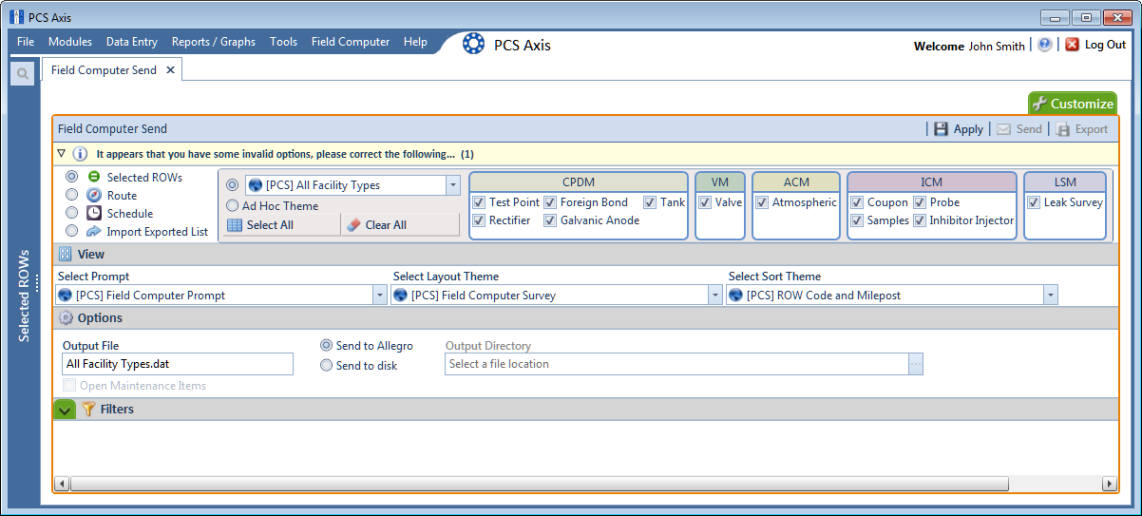
2 Click
Field Computer >
Send to open the
Field Computer Send window
(Figure 13-24).
Figure 13-24. Field Computer Send
Complete
step 3 (based on selected ROWs),
step 4 (based on a route),
step 5 (based on a schedule), or
step 6 (based on import exported list) to choose an option for displaying facility records in the grid:
3 To view facility records based on pipeline segment(s) selected in the Select ROWs window, follow these steps:
Figure 13-25. Field Computer Send Based on Selected ROWs
b Choose one or more facility types using one of the following options ():
• Click the down arrow and select a facility type theme in the selection list, such as

[
PCS] Rectifier Survey.
• Click Ad Hoc Theme and then click the check box for each facility type you want to view in the grid.
• Click the
Select All button

to view all facility types in the grid.
c Click
 Apply
Apply to update the grid and then continue with
step b.
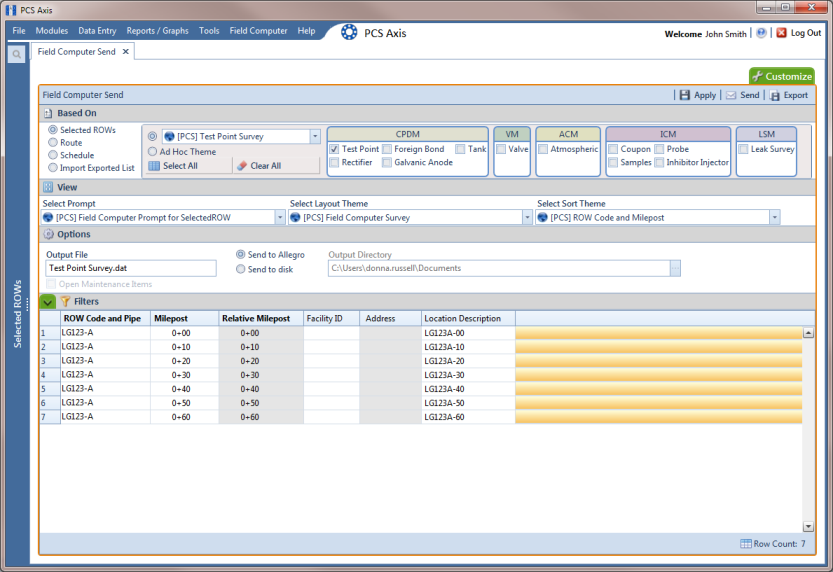
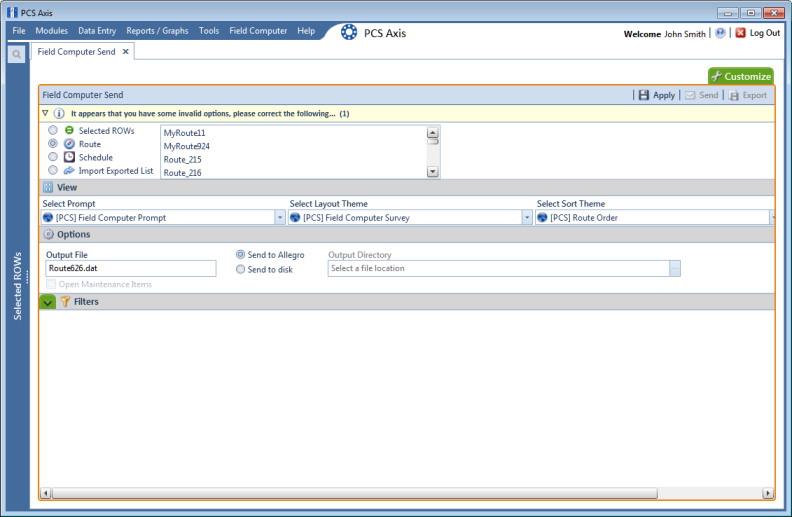
4 To view facility records based on a route:
a Click the
Route option and then select a route in the selection box (
Figure 13-26).
b Click
 Apply
Apply to update the grid and then continue with
step b.
Figure 13-26. Field Computer Send Based on Route
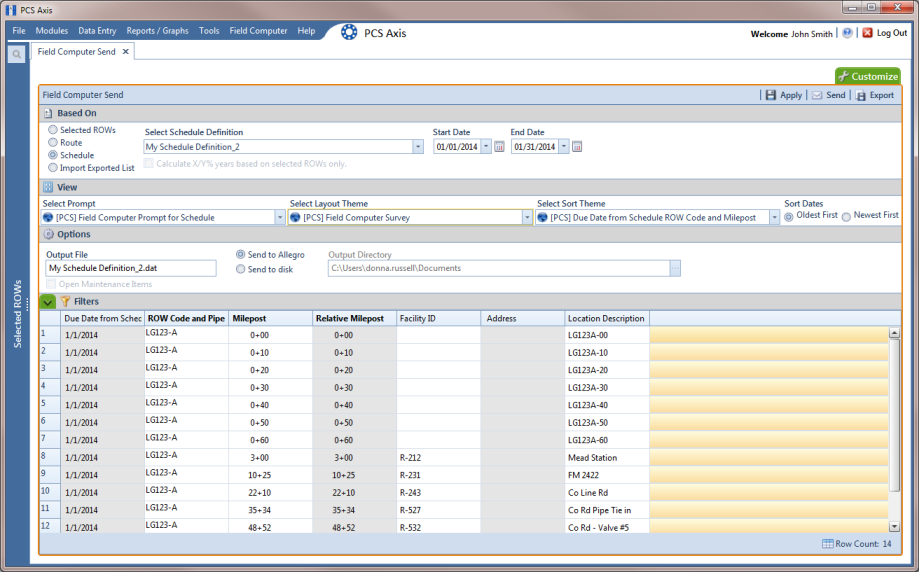
5 To view facility records based on a schedule, follow these steps:
a Click the
Schedule option
(Figure 13-27). Then click the down arrow in the
Select Schedule Definition field, and choose a schedule definition in the selection list.
Figure 13-27. Field Computer Send Based on Schedule
Complete step
"b" to enter a schedule date range or
"c" to set a schedule date range using dynamic dates:
b Type a start date in the Start Date field and an end date in the End Date field.
c To set a schedule date range using dynamic start and end dates, follow these steps:
1) Click the
Start Date 
calculator to open dynamic start date fields. Set properties in these fields in the following manner:
i) Click the down arrow in the Start Date field and select one of the following options: Today, Beginning Of Month, End Of Month, Beginning of Year, or End Of Year.
ii) In the remaining two fields, type an offset value in the first field and then click the down arrow in the second field and select one of the following options:
Day(s),
Month(s), or
Year(s). Click the

pencil button to close dynamic start date fields.
2) Click the
End Date 
calculator to open dynamic end date fields. Set properties in these fields in the following manner:
i) Click the down arrow in the End Date field and select one of the following options: Beginning Of Month, End Of Month, Beginning of Year, or End Of Year.
ii) In the remaining two fields, type an offset value in the first field and then click the down arrow in the second field and select one of the following options:
Day(s),
Month(s), or
Year(s). Click the

pencil button to close dynamic end date fields.
3) Click
 Apply
Apply to update the grid and then continue with
step b.
6 To view facility records based on an import exported list file, follow these steps:
Figure 13-28. Field Computer Send Based on Exported List
b Click the ellipsis button … in the field to display the Open dialog box. Navigate to the file and select it. Click Open to close the dialog box and return to the Field Computer Send window.
c Click
 Apply
Apply to update the grid and then continue with
step b.
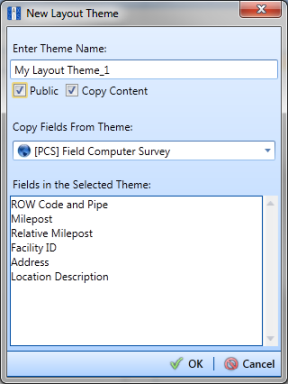
7 Click the
Customize tab

then the
 Add
Add button to open the
New Layout Theme dialog box (
Figure 13-29).
Figure 13-29. New Layout Theme
8 Type a name for the layout theme in the field Enter Theme Name. If you want to create a public theme, click the Public check box to place a check mark inside the check box. When the check box is empty, the layout saves as a private theme.
9 If you want to copy fields from another theme to the new layout theme, click the check box Copy Content. Then click the down arrow in the field Copy Fields From Theme and select a theme in the selection list.
10 Click
 OK
OK to save changes and return to the
Layouts page.
11 Verify the name of the new layout theme displays in the field Select Layout Theme. If not, click the down arrow in Select Layout Theme and select the new theme in the selection list.
12 Complete the following steps to add and remove fields in the new layout theme as needed:
a Click the toggle arrow

for a field category in the left pane of the window to view a list of fields available for selection. For example, click
 Facility Fields
.
b Double-click a field listed in the left pane to move it to the right pane. Repeat this step as needed. The grid layout theme includes all fields listed in the right pane of the Layouts page.
c To remove a field in the layout theme, double-click a field listed in the right pane to move it to the left pane. Repeat this step as needed.
13 To change the order of fields listed in the right pane and subsequently in the grid, click and drag a field to a new position in the list. Or, select a field and then click the up

or down

button.
14 Click
 Save and Close
 to return to the
Field Computer Send window.
15 To apply the new layout theme to the grid, click the down arrow in the field
Select Layout Theme and select the layout theme in the selection list. Then click
 Apply
Apply to update the grid.