Receiving a Continuous Survey from the Allegro
Information in this section explains how to receive an Allegro CeCi close interval survey file in PCS Axis.
Important: For data to transfer properly, the name of the pipeline entered in the Segment field of the Allegro CeCi survey file must match the ROW Code in PCS Axis. The survey name entered in the Run field of the CeCi survey file is used to create a survey folder in PCS Axis (Data Entry > Survey Folder Maintenance). See the Allegro MX User Guide for more information about setting properties in a CeCi survey file.
Complete the following steps:
1 Verify the Allegro is connected to your computer. If needed, refer to the Allegro User Guide for information about how to connect the device.
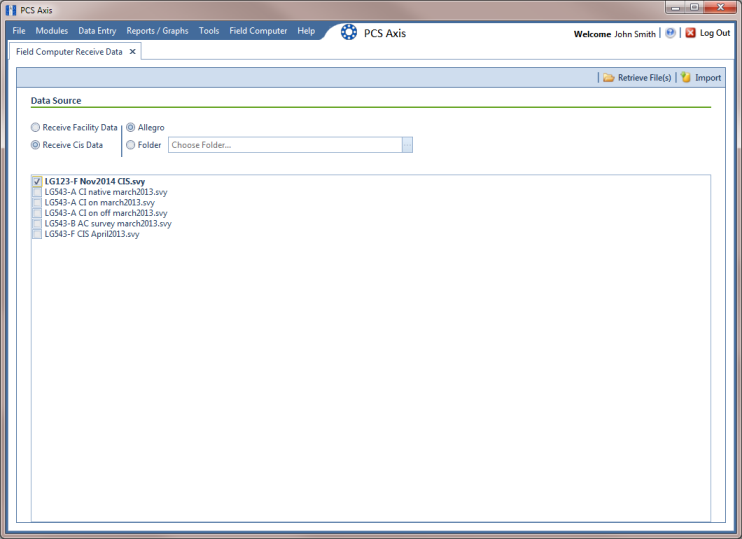
2 Click Field Computer > Receive to open the Field Computer Receive Data window.
3 Click Receive Cis Data, then click the Allegro option.
Note: CIS is an acronym for Close Interval Survey.
4 Click
 Retrieve File(s)
 to view a list of survey files available for selection (
Figure 13-19).
5 Select the close interval (CI) survey files you want to transfer from the Allegro. Click the check box for one or more survey files listed in the Field Computer Receive Data window.
A check mark inside a check box indicates a selection. To remove a selection, clear the check mark by clicking the check box again.
Figure 13-19. Field Computer Receive
6 Click
 Import
 to open the
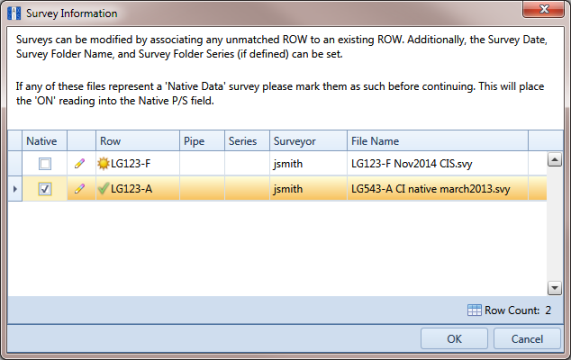
Mark Native dialog box (
Figure 13-20).
7 If you are importing a survey file with native survey data, click the Native check box to place a check mark inside the check box.
Figure 13-20. Mark Native
8 If you want to associate one or more existing pipeline Series with the survey, complete the following steps:
a Click the

pencil button in the
Mark Native dialog box to open the
Select Facility dialog box (
Figure 13-21).
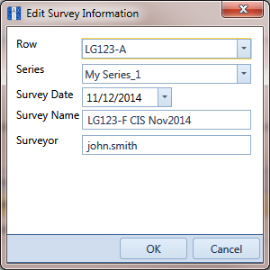
b Click the Row field and select a pipeline segment in the selection list that you want to associate with the survey.
c Click the Series field and select a pipeline Series in the selection list that you want to associate with the survey.
Figure 13-21. Select Facility
d If you want to change the date the survey was taken, click the down arrow in the Survey Date field and choose a survey date using a calendar. You can also type a survey date in the field using the format MM/DD/YYYY to indicate the month, day, and year.
e If you want to change the name of the survey file, type a survey name in the Survey Name field.
f If you want to change the name of the person who took the survey, type a name in the Surveyor field.
g Click OK to close the Select Facility dialog box. Updated information displays in the Survey Information dialog box.
h Click OK to close the Mark Native dialog box and import the survey file.
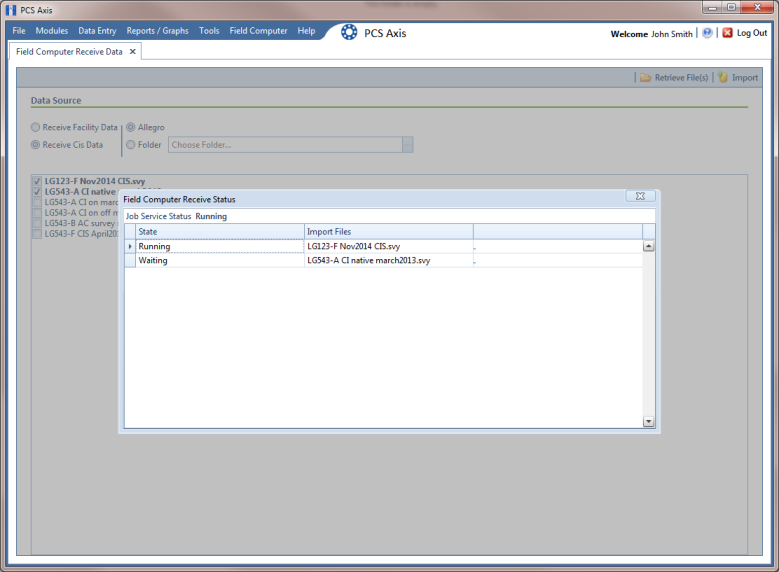
The
Field Computer Receive Status window displays showing the status of the import process (
Figure 13-22).
Note: Survey data imported from the Allegro is indicated in the Edit ISM Data grid with information in the Allegro Survey Information field.
Figure 13-22. Field Computer Receive Status